One thing beginning game developers using Unity 3D might want to do early on is to have a 3rd person character that is followed around by a camera. It is fairly simple to accomplish, but it can be tricky if not done correctly.
Here are the steps.
- Import Assets -> Import Package -> Characters. (Accept the defaults).
- Import Assets ->Import Package -> Cameras. (Accept the defaults).
- Make a ground object.
- create a cube object (Game Object -> 3D Object -> Cube)
- rename it ground
- set its scale property to (100, 1, 100)
- add a texture image (just import one and drag it to the ground object)
- Add a Multipurpose Camera Rig
- In the Project tab, find the following: Assets -> Standard Assets -> Cameras -> Prefabs -> MultiPurposeCameraRig
- Drag and drop the MultiPurposeCameraRig prefab to the scene window
- Disable the MainCamera by selecting it in the Hierarchy window, then deselecting the checkbox next to the “Main Camera” name in the Inspector window.
- Add a 3rd Person Character
- Also in the Project tab, find: Assets ->Standard Assets -> Characters -> ThirdPersonCharacter -> Prefabs -> ThirdPersonController
- Drag and drop a ThirdPersonController prefab to the scene window
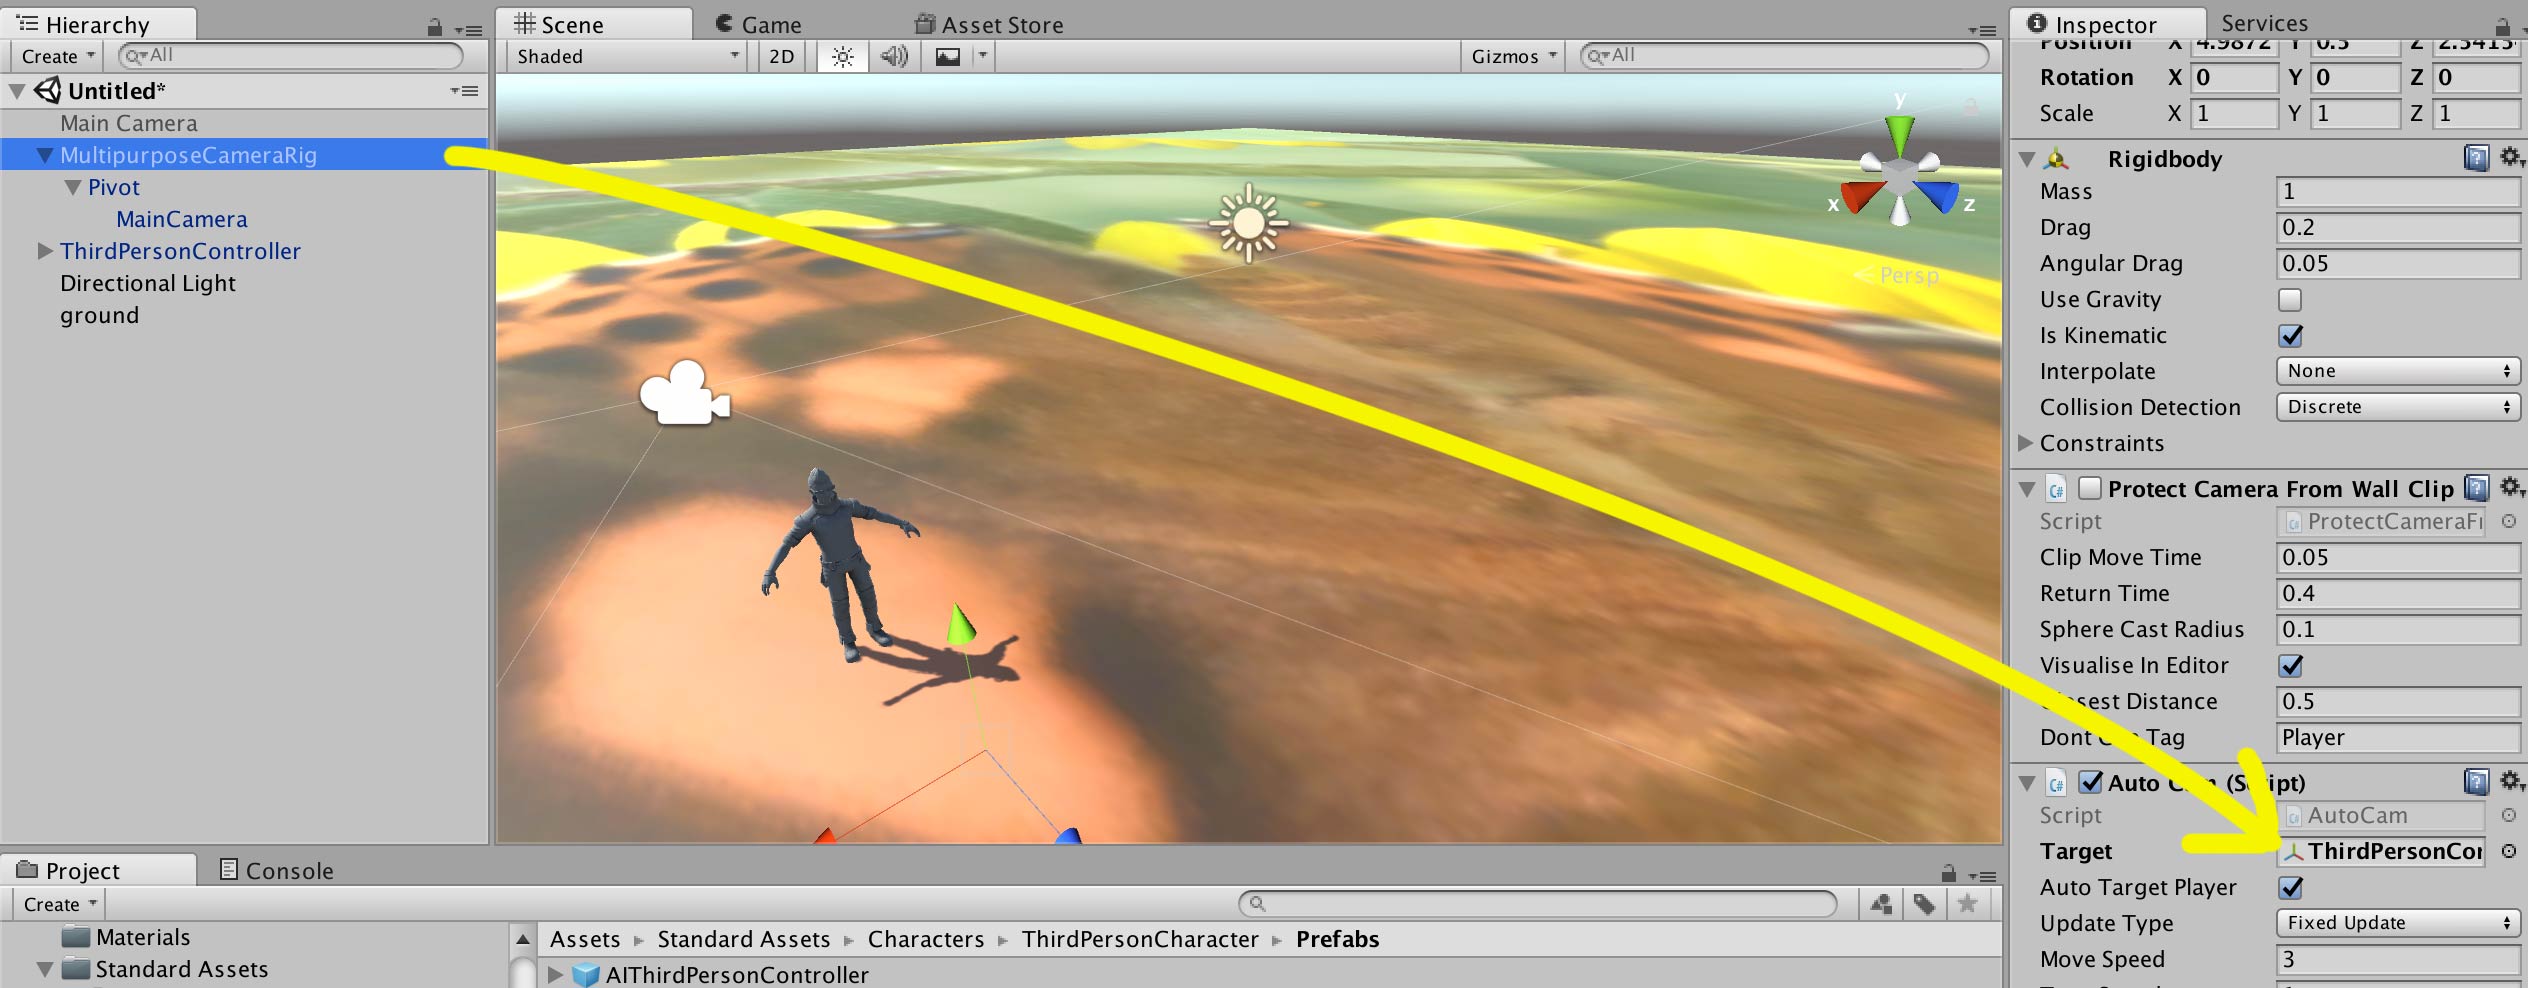
- Connect the Multipurpose Camera Rig to the ThirdPersonController
- Select the MultipurposeCameraRig object in the Hierarchy window.
- Drag the ThirdPersonController from the Hierarchy window to the “Target” field of the MultipurposeCameraRig’s Auto Cam Script found in the Inspector panel. (Should be dragging across from the leftmost panel to the rightmost panel.)
- That’s it. Play the game and if everything is setup correctly, you should have a camera that follows the player.