Monthly Archives: September 2017

Soul2Soul: World Tour

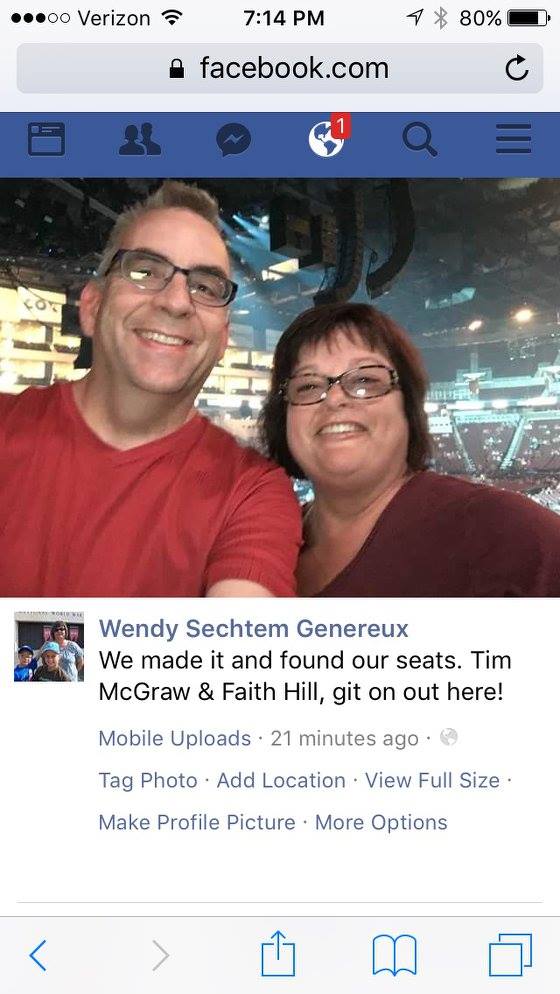
Last week my wife Wendy & I saw the Tim McGraw and Faith Hill concert in Wichita, KS. This might sound like a pretty ordinary thing since people go to concerts all the time, but for us it was a special night. We’ve been married 24 years, and I can’t think of one concert we’ve been to that was similar to this one.

Our tickets came courtesy of Vettix.org, an organization that provides free tickets to active duty service members and veterans. According to the website…

Vet Tix provides tickets to events which reduce stress, strengthen family bonds, build life-long memories and encourage service members and veterans to stay engaged with local communities and American life.

I would say that in my case, it did just that. Because we have made the choice that mom would stay at home instead of working at a job while we raise kids, money has always been tight for us. Going to expensive entertainment venues just doesn’t happen much.

Concert Selfie

I also commute to work every day over an hour’s drive each way because we live in a rural area of Kansas. This means attending something like a concert is going to require some extra effort just to make it happen. Wichita is more than an hour beyond where I work, so the day of the concert, Wendy met me at work, and we continued on from there.

Our tickets were “will call” which I wasn’t familiar with the process, but it meant we had to arrive early and pick up our tickets at the box office. Our information said the doors opened an hour before showtime, so we arrived about 15 minutes after the doors opened. I was afraid there would be a long line to get our tickets, and another long line to get into the show. But it worked out that we got right in to get our tickets, and once we had our tickets, we’d already passed through security so we didn’t have to wait in line again.

We ate a bite of fast food through a drive-through on the way there, because we didn’t know what our options would be once we arrived. We laughed when we got inside the InTrust Bank Arena and it was like a ball game environment with dozens of vendors were there.

The concert was a little bit like when you show up at the movies for announced showtime, and you have to sit through half an hour of ads and previews. The show was scheduled to start at 7:30, but I recall the opener didn’t take the stage until around 7:50.

opener

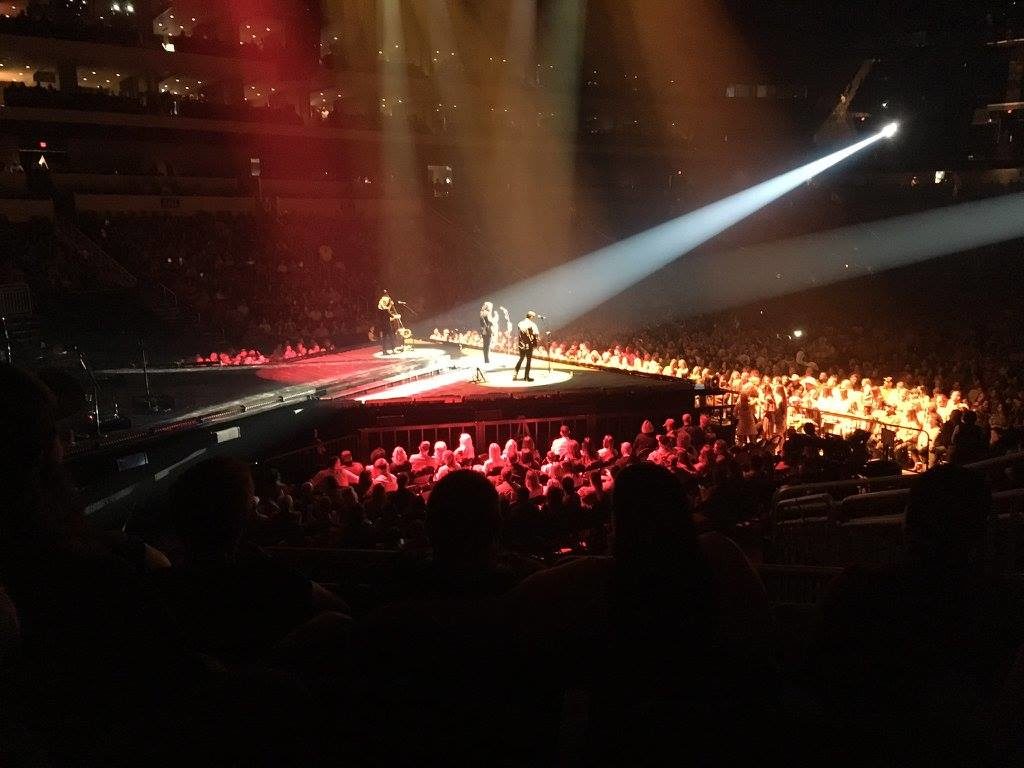
Somewhere around 8:30-something, Tim & Faith finally took the stage. Oh, the lights and sounds, so large that you could feel it in your bones. It honestly felt like more of a rock concert than country. I looked and looked, but couldn’t find the tour bassist’s name. He was one of the most entertaining people I saw on stage. Totally into it; he rocked the entire show.

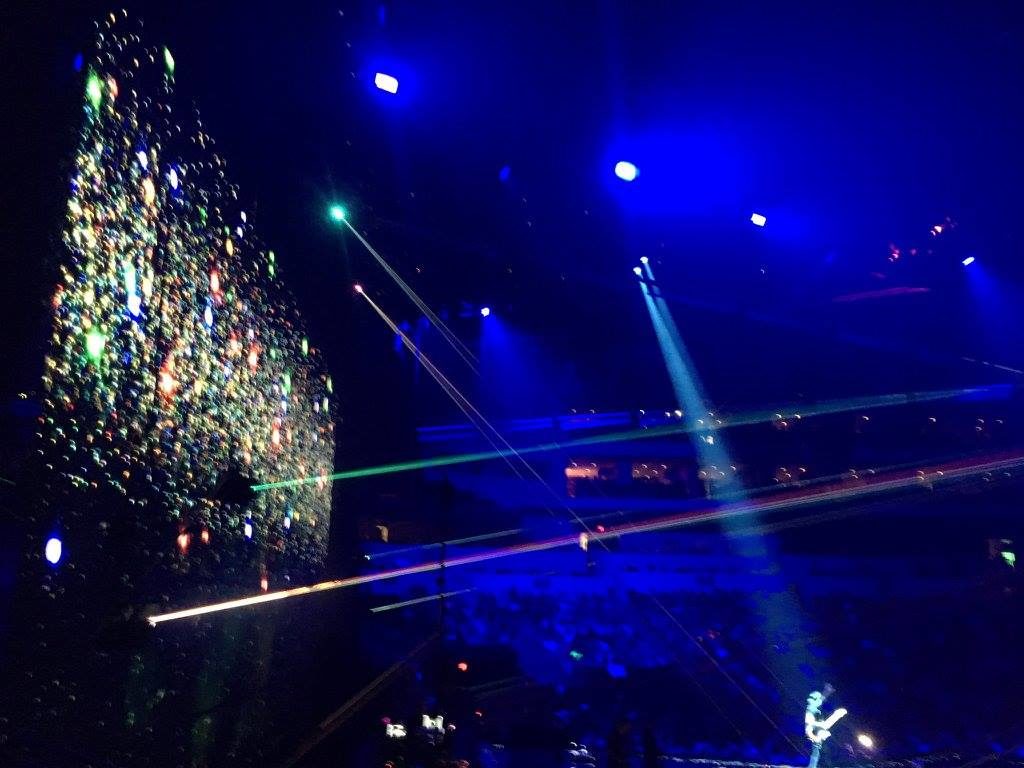
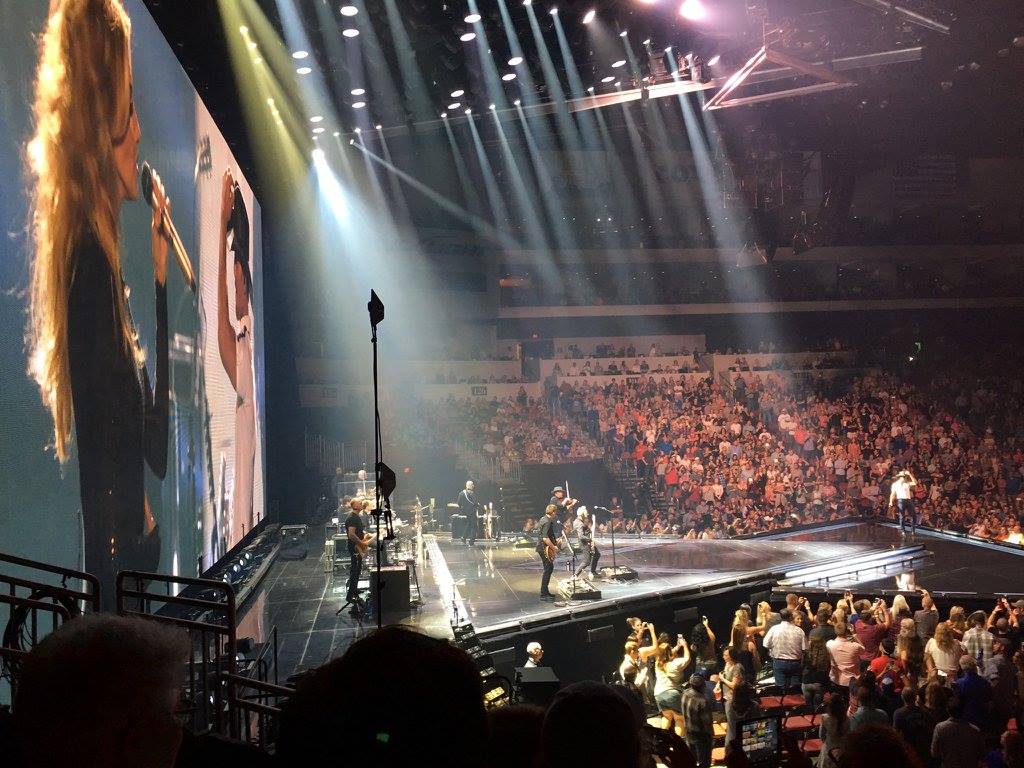
The whole thing was very  theatrical. The laser lights reminded me of the time I went to see Yes: Big Generator in concert in Tokyo. But this show was even bigger than that one, mostly because of new media that is available.

scrims

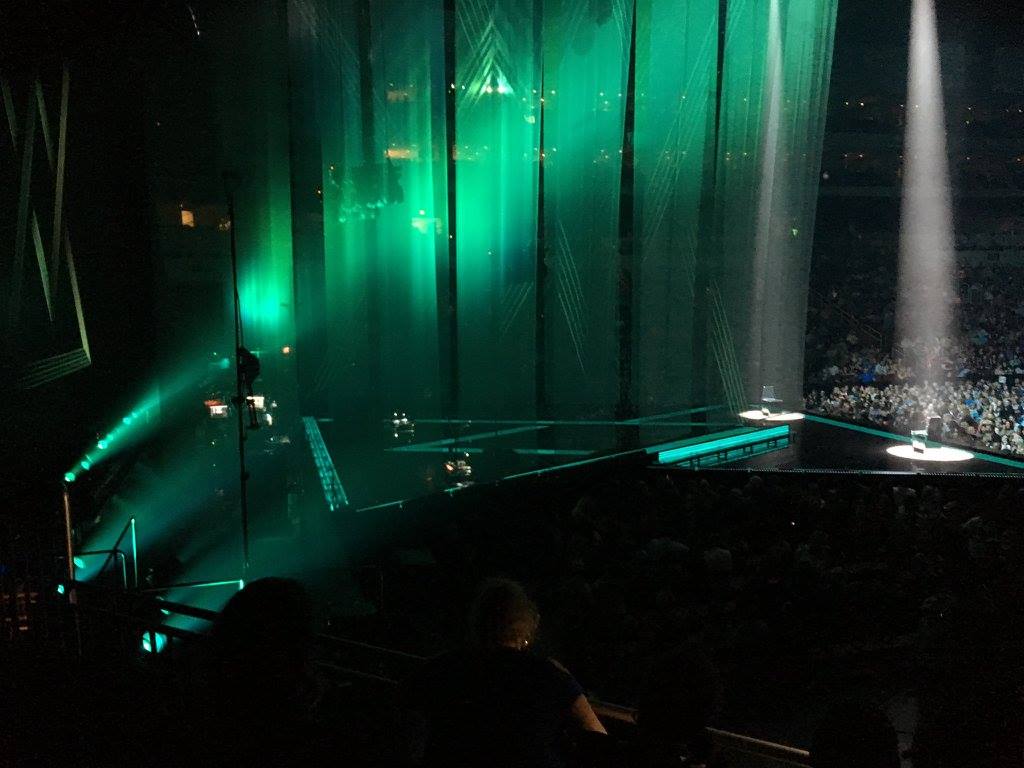
Video was a big part of the show. Some of it showed up on automated scrims that lowered and raised, and arranged themselves in different patterns to show video and video effects.

Light Show

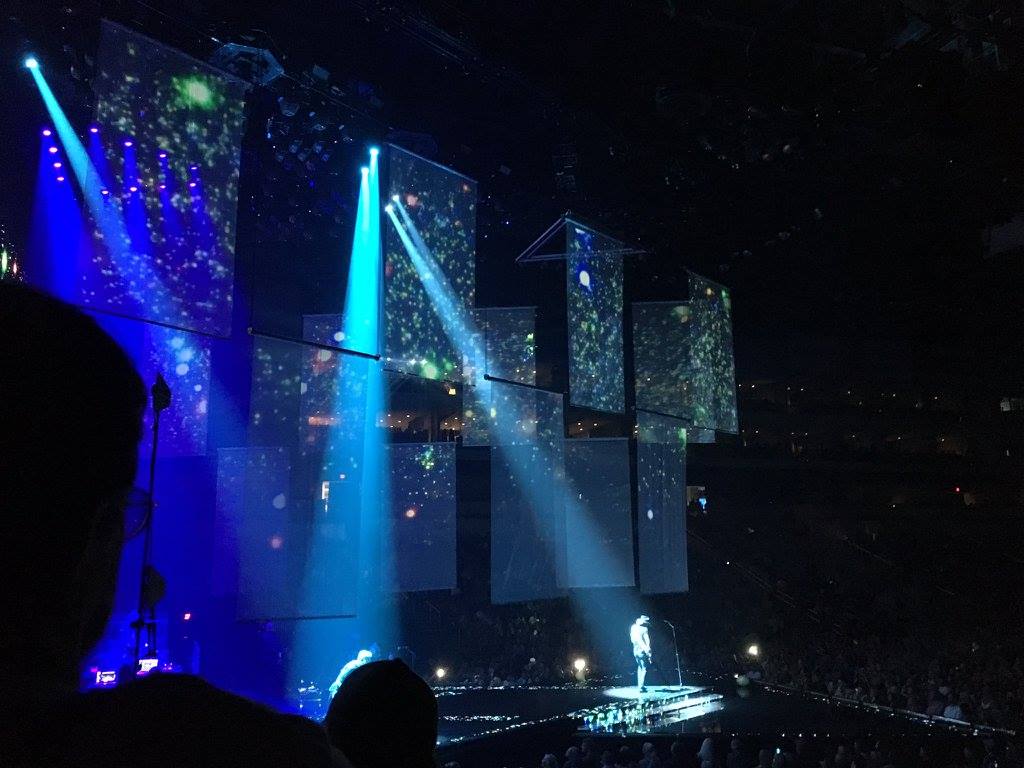
Other video showed up on the big screen behind the stage. We were sitting so far forward in the auditorium, it was hard for us to see much on that big screen.
Light Show

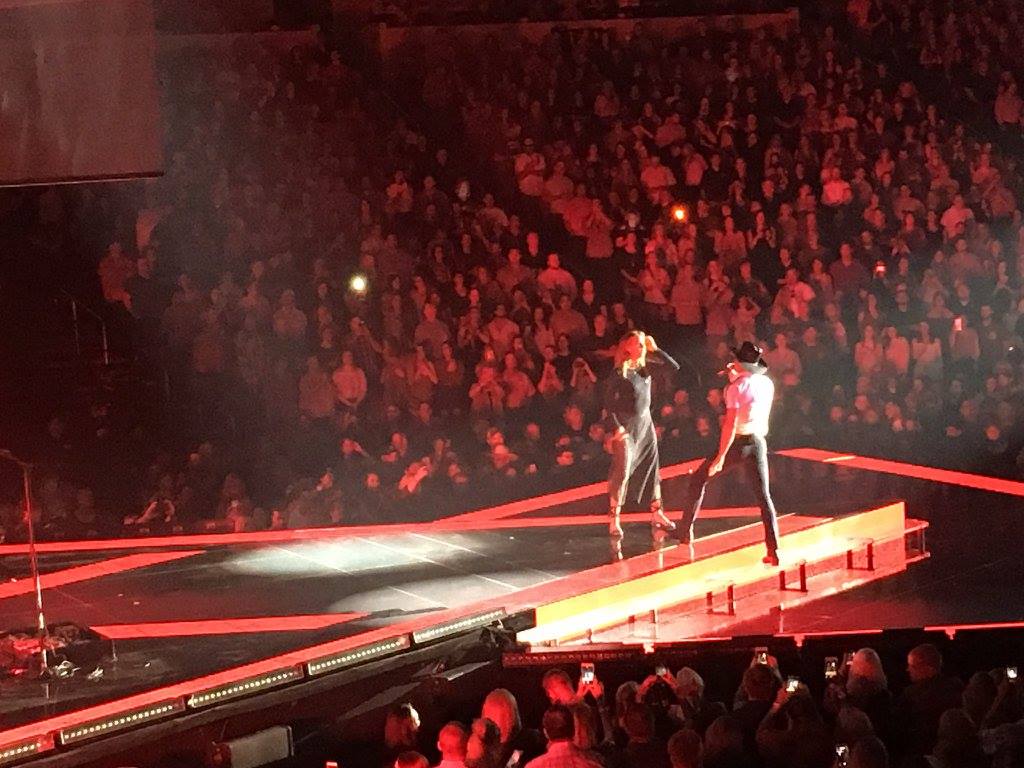
But we were close to the performers. At times, really close, like in this picture of Faith Hill taken on an iPhone.Faith Hill up close

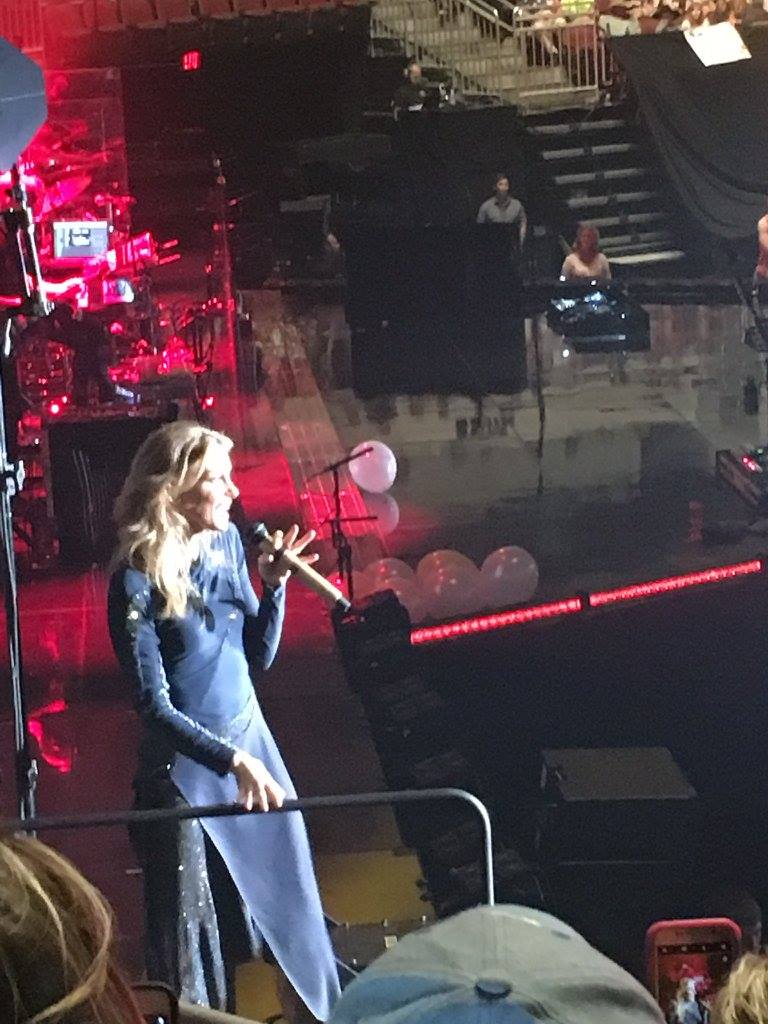
She was right there by us, and almost everyone had their phone out. Early on, I decided that the quality of my photos and videos wouldn’t be much to write home about, so I planned to put the phone away for most of the evening and enjoy the show. But when she came up right near where we were sitting, I had to try to get some kind of photo. I’m glad I did.faith1 faithTim stage

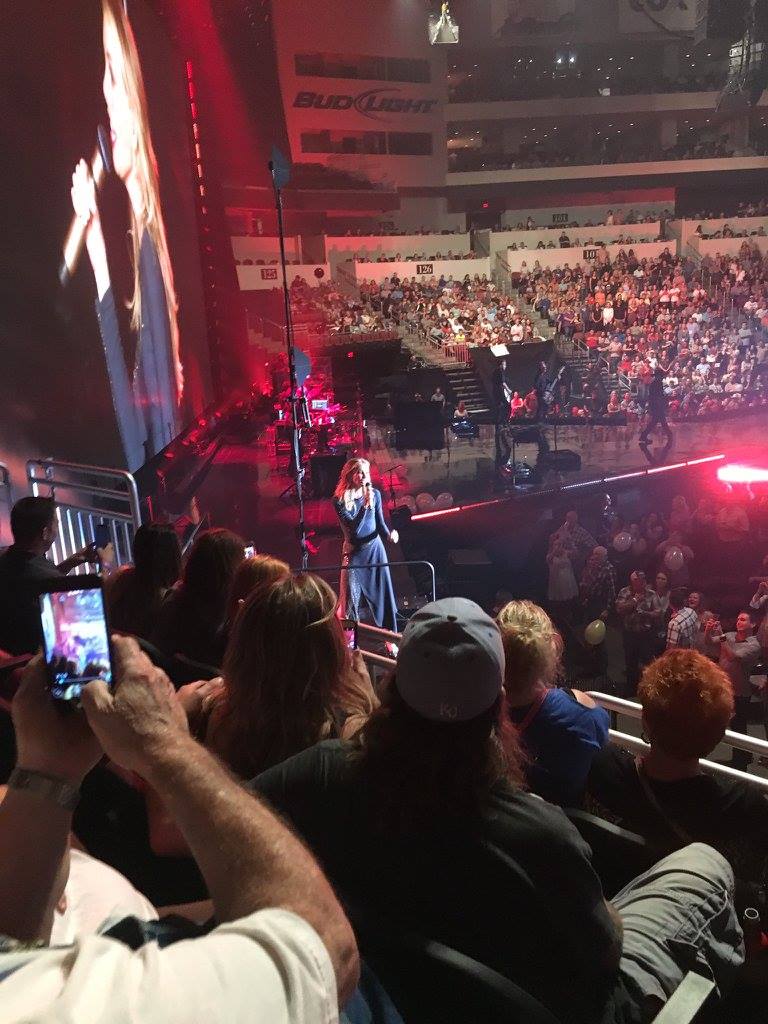
It was a great concert, and a wonderful date night out with my wife, something that is far too rare. It was very memorable and I thank the Vettix people so much for making this happen.

Exponential Growth Simulation

I’ve been working at improving my Unity3D skills. We are using Unity in the Game Programming class I’m teaching this semester. I wanted to build a project that focused on creating some GameObjects that interact with each other through various public methods. So I made a growth simulation that represents a group of bacteria eating and reproducing.

The game objects include bacteria, food, and a game manager. All the food object does is keep track of how much food is available, and provide a public method called supplyFood(), with which the bacteria can acquire food to eat. The game manager object creates a grid of food tiles to be used as a food supply. It also keeps track of the number of bacteria in the game through public methods addBacteria() and removeBacteria().

The bacteria does a number of things. I tried to make this object class self-managing. So it has a timer that makes regular calls to the eat() method, and reproduce() method is based on doing a number of eats. There is also a die() method that takes the bacteria out of the game. But it doesn’t completely work correctly yet, I’m still debugging it.

One tricky part was finding out if the bacteria was touching a food tile, so it could eat. I used a collision detection method to initiate that. It is interesting how objects can connect with one another. Here is an example of how the bacteria connects to the food.

These variables are declared to give access to the foodTile object and the supplyFood() method of its food script:

  public GameObject foodTile; // the food object 
  public food food; // the food script found in the foodTile object; provides access to the supplyFood() method. 
  private int foodAmt; // the food counter

When a bacterium collides with (sits upon) a foodTile tagged “food” it opens a connection to the script it contains called “food.” I was concerned that doing this each time a new bacterium is created and collides with a foodTile, it would be a lot of processing overhead. But so far, it seems to be working.

   void OnCollisionEnter(Collision collision)
   {
      if (collision.collider.gameObject.tag == "food")
      {
         foodTile = collision.collider.gameObject; // connects the foodTile to this bacterium
         food = foodTile.GetComponent<food>(); // the food script of foodTile gives us supplyFood() method
      }
    }

Here is the eat() method that uses that uses the food script of the foodTile.

     public void eat()
     {
         int foodAmt = food.supplyFood();
     }

It took me a while to understand how getComponent works. It basically allows access to any component of a given object, including scripts. object.getComponent<component>();

Here is a video of what it looks like in Unity3D right now:

Old With New

Japan War

Yesterday’s Daily Create called for juxtaposition of old with new. As a starting point, it gave us some old Japanese & Chinese prints to work with.

I selected the above print, and used Photoshop to add in something new, the aircraft carrier USS George H.W. Bush. The assignment offered “extra Internet points” for animating it, so I did that as well.

To animate an object in photoshop, I enabled the timeline. I pasted in the carrier on a new layer, after cutting it out with a selection made using the pen tool. I pasted it on to the post card. On the post card, I also cut out some of the foreground scenery and pasted it onto the topmost layer, allowing the aircraft carrier to sail in the background.

Using the timeline, I created new frames, and moved the carrier a bit to the left on each frame. My gif uses ten frames of animation. Once it was all completed, I saved using the export for web feature, saving it as an animated gif.

Character Following Camera in Unity3D

One thing beginning game developers using Unity 3D might want to do early on is to have a 3rd person character that is followed around by a camera. It is fairly simple to accomplish, but it can be tricky if not done correctly.

Here are the steps.

  1. Import Assets -> Import Package -> Characters. (Accept the defaults).
  2. Import Assets ->Import Package -> Cameras. (Accept the defaults).
  3. Make a ground object.
    • create a cube object (Game Object -> 3D Object -> Cube)
    • rename it ground
    • set its scale property to (100, 1, 100)
    • add a texture image (just import one and drag it to the ground object)
  4. Add a Multipurpose Camera Rig
    • In the Project tab, find the following: Assets -> Standard Assets -> Cameras -> Prefabs -> MultiPurposeCameraRig
    • Drag and drop the MultiPurposeCameraRig prefab to the scene window
    • Disable the MainCamera by selecting it in the Hierarchy window, then deselecting the checkbox next to the “Main Camera” name in the Inspector window.
  5. Add a 3rd Person Character
    • Also in the Project tab, find: Assets ->Standard Assets -> Characters -> ThirdPersonCharacter -> Prefabs -> ThirdPersonController
    • Drag and drop a ThirdPersonController prefab to the scene window
  6. Connect the Multipurpose Camera Rig to the ThirdPersonController
    • Select the MultipurposeCameraRig object in the Hierarchy window.
    • Drag the ThirdPersonController from the Hierarchy window to the “Target” field of the MultipurposeCameraRig’s Auto Cam Script found in the Inspector panel. (Should be dragging across from the leftmost panel to the rightmost panel.) Connect Camera to Character
  7. That’s it. Play the game and if everything is setup correctly, you should have a camera that follows the player.

Instantiate a Prefab using Code in Unity 3D – Part 2

In our previous post, we learned how to use code to create an instance of a prefab object in Unity3D. In this post, we will see the power of using code to do repetitious work. Whenever I think of using code to do something that repeats, I think of using loops.

Last time we created a graphic that represented one single step of a staircase. Now we will create many instances of that same graphic, and move them in such a way that it builds a staircase. To do that, we will use the famous “for/next loop”

instPlank4Here is our single step. Now let’s make some more to create a staircase.

Open the “MakeStep” script from last time. Look in the Start() method for this line of code:

Instantiate(stepPrefab, stepPos, Quaternion.identity);

This is the piece that brings our stepPrefab into our Unity world. Now, let’s add a for loop around it to get it to repeat and build a “Stairway to Heaven.” Your code should look something like this:

for(float i = 0; i < 20; i++) 
  { stepPos.y = i;
    stepPos.z = i;
    Instantiate(stepPrefab, stepPos, Quaternion.identity);
  }

If we run the code at this point, we’ll get a staircase that looks like this:

instPlank5

The y values are too far apart, and the z values will overlap. I want my staircase to be useable by a character in the game. So I will modify my loop to bring my steps closer together.

for(float i = 0; i < 20; i++) 
  { stepPos.y = i / 4;
    stepPos.z = i * 2;
    Instantiate(stepPrefab, stepPos, Quaternion.identity);
  }

This is more like it:
instPlank6Now, we just have to add a floor, and a character to the scene, and we’ll be in business!

To make a floor, create a new cube. Set its position to (0,0,0). Give it a texture using a graphic or color using a material. Set its scale to 100 x 1 x 100.

To add a character to the scene, Import the characters package, accepting all defaults. It will take a minute or two to bring in all of the stuff for characters. It is found under Assets -> Import Package -> Characters.

instPlank7

After everything installs, in the newly created “Standard Assets” folder, go to Standard Assets -> Characters -> FirstPersonCharacter -> Prefabs and select  the FPSController prefab. Drag it into the scene. Because the character has its own camera, you should disable the Main Camera in the hierarchy.

You should be able to play the game and move around in the world you just created using the mouse and arrow keys. Here is a view from beside the staircase.

instPlank8So that is my introduction to creating prefab objects in Unity3D using C# code.

Students and Educators can get Unity3D for free so you should try it. Download it here.


Instantiate a Prefab using Code in Unity 3D – Part 1

This year, in the Game Programming course I teach, at the urging of my students we have begun working with Unity3D. I’ve always used Flash in the past for this course, but some things have changed for me both personally and professionally to where I felt I could spare the time to begin with a new development platform. Any interested students or educators can learn along with us by downloading Unity3D for free.

For this post, we are going to discuss creating prefab objects (just a saved game object that has some preconfigured properties added to it) and using code to create instances of those prefabs.

To begin, let’s make a prefab object by creating a new cube (Game Object -> 3D Object -> Cube) and setting its position at (0,0,0). Rename this cube to “stepPrefab.” Scale the x dimension to 10, and the z dimension to 2, and the y dimension 0.25. This will create a plank-like block that will become a step in what will later become a staircase.

instPlank

Decorate the step as you like using materials or graphics. Online, I found an image of bricks I used to make a brick texture, but you can also simply create a material and set its color to use. Once you have decorated the step, create a “prefabs” folder in the project panel under Assets. Drag and drop your decorated brick into the prefabs folder. There it will become a prefabricated object or “prefab” that we can manipulate with code. Delete the stepPrefab object from the hierarchy tab, but leave it where you put it in the prefabs folder. Except for the light and camera, our world should be empty again.

instPlank2

Next, create a new folder called “scripts” under Assets, also in the Project panel. Create a new C# script inside of the scripts folder, either by right-clicking or clicking on the Create button. Name this script to “MakeStep.” Double-Click the “MakeStep” script to open it in an editor.

Just inside of the MakeStep class, declare a public variable of type Game Object called “stepPrefab” and a second of type Vector3 called “stepPos” at the game’s origin position. That code looks like this:

public GameObject stepPrefab;

public Vector3 stepPos = new Vector3(0f, 0f, 0f);

Now, inside of the Start() function write a line of code that will instantiate (create)  an instance of our stepPrefab object. Here’s the code:

Instantiate(stepPrefab, stepPos, Quaternion.identity);

Here, the Instantiate function creates a new stepPrefab object, places it at the stepPos position, and uses no rotation (that’s the Quaternion.identity bit.)

Save and build the script. Now, switch back to Unity3D. Create an empty game object. Give it a name “stairs.” With “stairs” still selected, browse to the folder containing the MakeStep script, and drag that script on to the “add component” area of the inspector window. This should add the MakeStep script to the empty “stairs” object, now visible as a component of “stairs” in the inspector.

Inside the script component just added, locate the field box called “Step Prefab.” Right now, it should say “None (Game Object).” This is where we will make the connection between the Unity 3D world, and the MakeStep script. To do this, drag and drop the stepPrefab object in the Assets/prefabs folder over to the Step Prefab box in the inspector window. Now our world and our script should be connected together.

instPlank3

If everything is in order, it is time to test our world. Click the play button in unity. You should now see an instance of the stepPrefab object.

instPlank4

Next up, we will build a set of stairs using this object.

Unity Programming – A New Platform.

I’ve been teaching the Game Programming class with Unity 3D for two weeks now. This is the first time we’ve used Unity in the class. It’s been interesting, and a challenge to my previous knowledge on the subject. In previous iterations of the course, we used Flash and Actionscript.

Something new I learned about recently is the comparison between inheritance and composition in object oriented programming. I hadn’t really encountered composition before, only the inheritance approach. So when diving into Unity, I didn’t really see OOP with inheritance and I wondered why that was the case. It turns out the Unity uses a composition approach.

Basically, instead of having a superclass and subclasses that all must conform to or override the superclass, each object is assembled out of components or capabilities.

This old JavaWorld article explained it nicely for me. https://www.javaworld.com/article/2076814/core-java/inheritance-versus-composition–which-one-should-you-choose-.html