In our previous post, we learned how to use code to create an instance of a prefab object in Unity3D. In this post, we will see the power of using code to do repetitious work. Whenever I think of using code to do something that repeats, I think of using loops.
Last time we created a graphic that represented one single step of a staircase. Now we will create many instances of that same graphic, and move them in such a way that it builds a staircase. To do that, we will use the famous “for/next loop”
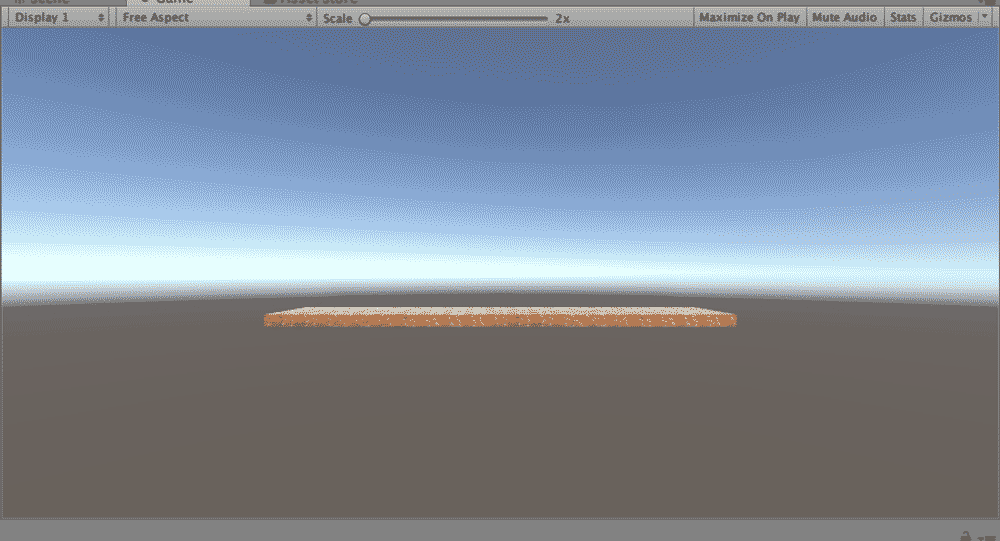 Here is our single step. Now let’s make some more to create a staircase.
Open the “MakeStep” script from last time. Look in the Start() method for this line of code:
Instantiate(stepPrefab, stepPos, Quaternion.identity);
This is the piece that brings our stepPrefab into our Unity world. Now, let’s add a for loop around it to get it to repeat and build a “Stairway to Heaven.” Your code should look something like this:
for(float i = 0; i < 20; i++)
  { stepPos.y = i;
    stepPos.z = i;
    Instantiate(stepPrefab, stepPos, Quaternion.identity);
  }
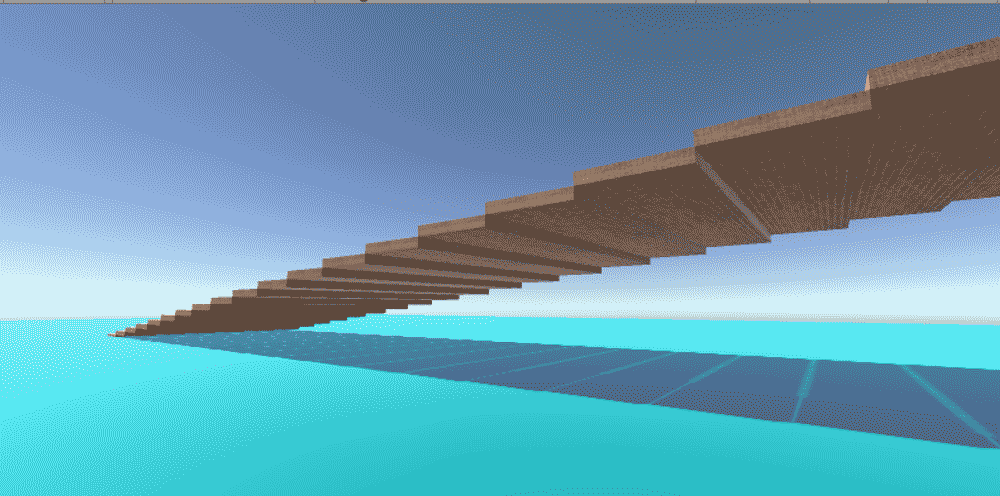
If we run the code at this point, we’ll get a staircase that looks like this:
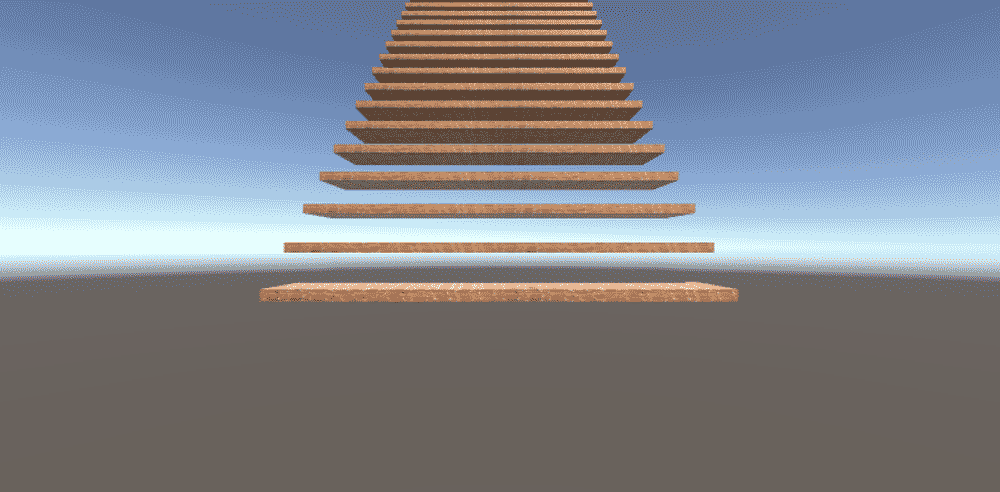
The y values are too far apart, and the z values will overlap. I want my staircase to be useable by a character in the game. So I will modify my loop to bring my steps closer together.
for(float i = 0; i < 20; i++)
  { stepPos.y = i / 4;
    stepPos.z = i * 2;
    Instantiate(stepPrefab, stepPos, Quaternion.identity);
  }
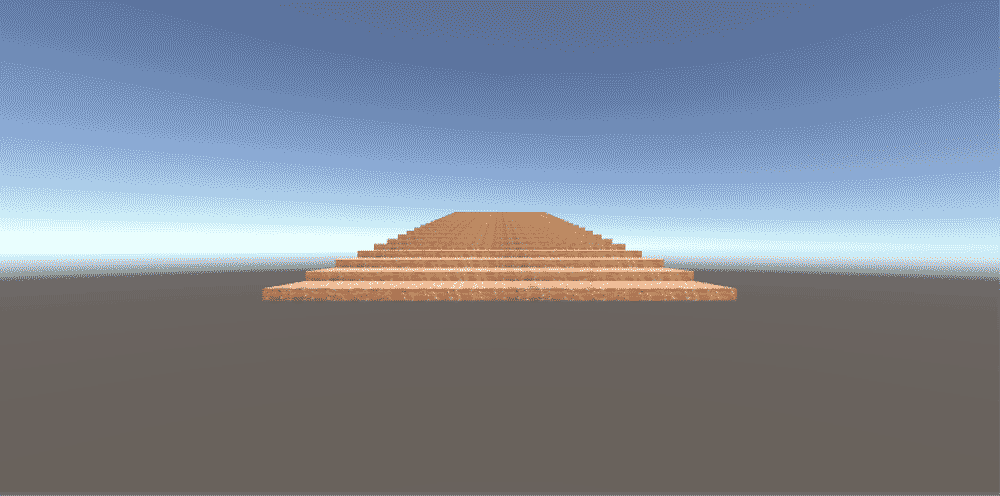
This is more like it:
 Now, we just have to add a floor, and a character to the scene, and we’ll be in business!
To make a floor, create a new cube. Set its position to (0,0,0). Give it a texture using a graphic or color using a material. Set its scale to 100 x 1 x 100.
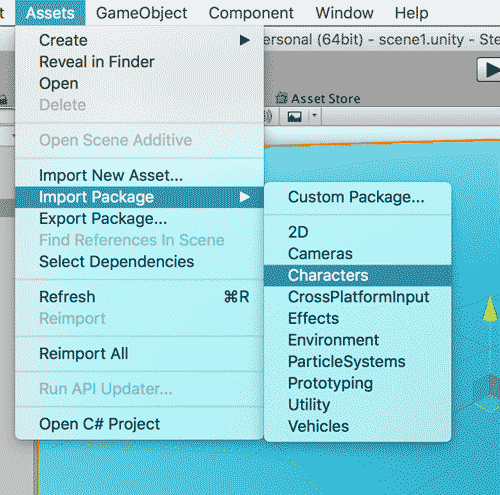
To add a character to the scene, Import the characters package, accepting all defaults. It will take a minute or two to bring in all of the stuff for characters. It is found under Assets -> Import Package -> Characters.
After everything installs, in the newly created “Standard Assets” folder, go to Standard Assets -> Characters -> FirstPersonCharacter -> Prefabs and select the FPSController prefab. Drag it into the scene. Because the character has its own camera, you should disable the Main Camera in the hierarchy.
You should be able to play the game and move around in the world you just created using the mouse and arrow keys. Here is a view from beside the staircase.
 So that is my introduction to creating prefab objects in Unity3D using C# code.
Students and Educators can get Unity3D for free so you should try it. Download it here.