This year, in the Game Programming course I teach, at the urging of my students we have begun working with Unity3D. I’ve always used Flash in the past for this course, but some things have changed for me both personally and professionally to where I felt I could spare the time to begin with a new development platform. Any interested students or educators can learn along with us by downloading Unity3D for free.
For this post, we are going to discuss creating prefab objects (just a saved game object that has some preconfigured properties added to it) and using code to create instances of those prefabs.
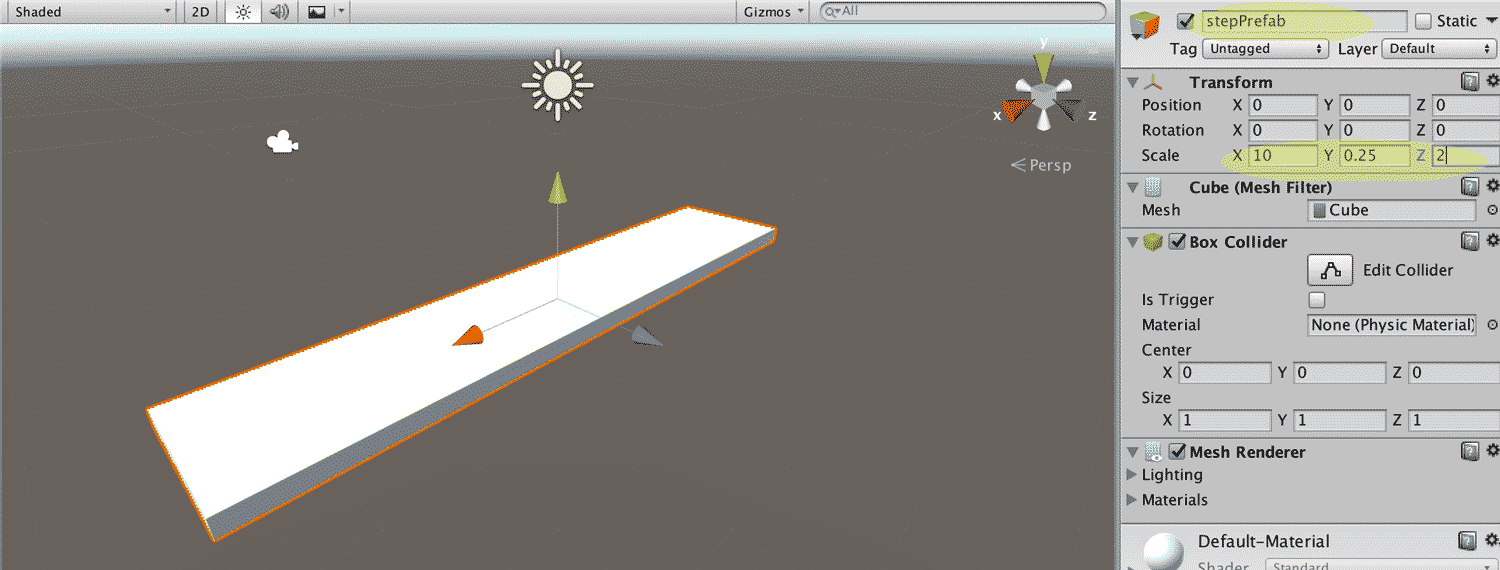
To begin, let’s make a prefab object by creating a new cube (Game Object -> 3D Object -> Cube) and setting its position at (0,0,0). Rename this cube to “stepPrefab.” Scale the x dimension to 10, and the z dimension to 2, and the y dimension 0.25. This will create a plank-like block that will become a step in what will later become a staircase.
Decorate the step as you like using materials or graphics. Online, I found an image of bricks I used to make a brick texture, but you can also simply create a material and set its color to use. Once you have decorated the step, create a “prefabs” folder in the project panel under Assets. Drag and drop your decorated brick into the prefabs folder. There it will become a prefabricated object or “prefab” that we can manipulate with code. Delete the stepPrefab object from the hierarchy tab, but leave it where you put it in the prefabs folder. Except for the light and camera, our world should be empty again.

Next, create a new folder called “scripts” under Assets, also in the Project panel. Create a new C# script inside of the scripts folder, either by right-clicking or clicking on the Create button. Name this script to “MakeStep.” Double-Click the “MakeStep” script to open it in an editor.
Just inside of the MakeStep class, declare a public variable of type Game Object called “stepPrefab” and a second of type Vector3 called “stepPos” at the game’s origin position. That code looks like this:
public GameObject stepPrefab;

public Vector3 stepPos = new Vector3(0f, 0f, 0f);
Now, inside of the Start() function write a line of code that will instantiate (create) an instance of our stepPrefab object. Here’s the code:
Instantiate(stepPrefab, stepPos, Quaternion.identity);
Here, the Instantiate function creates a new stepPrefab object, places it at the stepPos position, and uses no rotation (that’s the Quaternion.identity bit.)
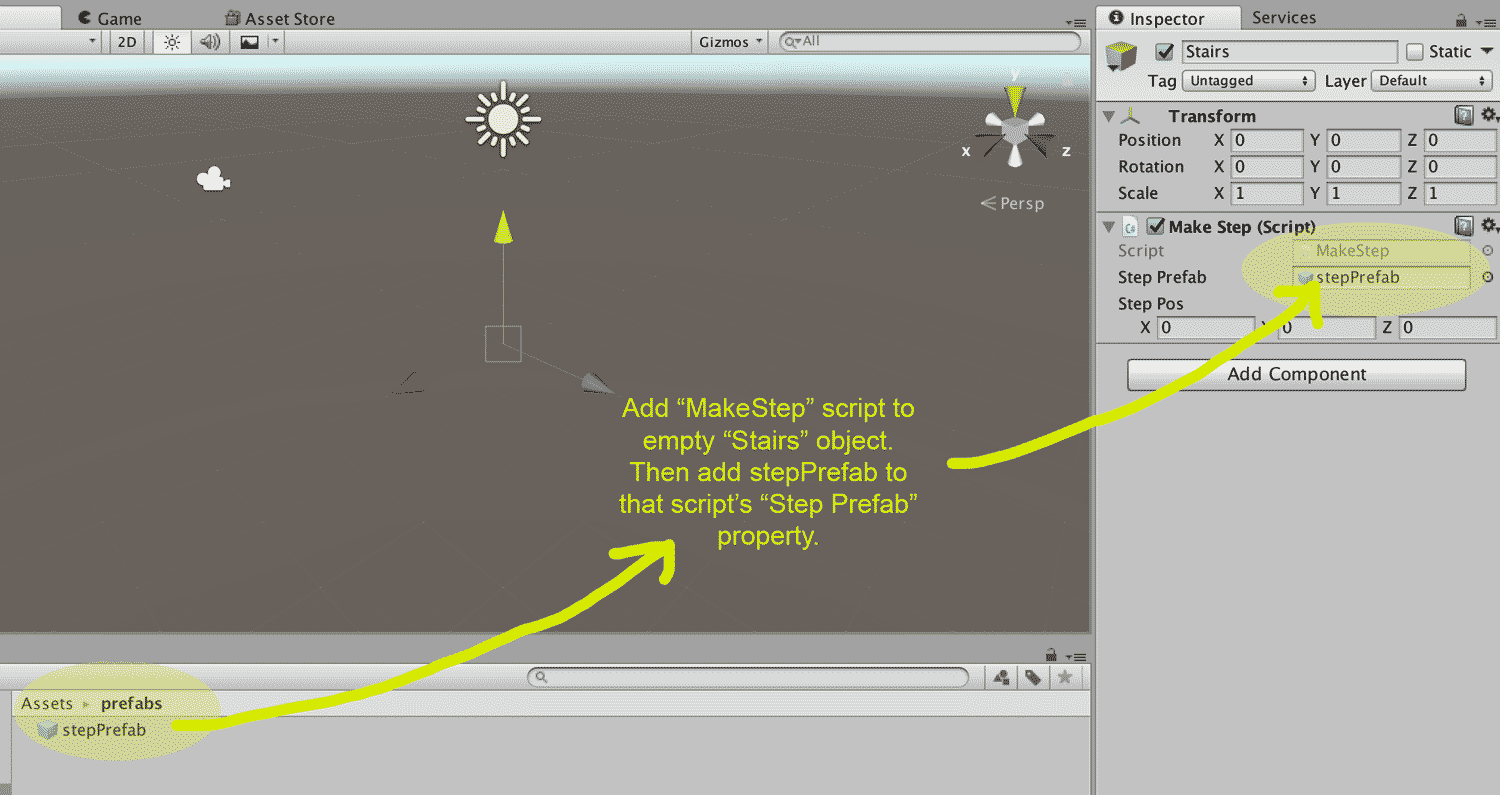
Save and build the script. Now, switch back to Unity3D. Create an empty game object. Give it a name “stairs.” With “stairs” still selected, browse to the folder containing the MakeStep script, and drag that script on to the “add component” area of the inspector window. This should add the MakeStep script to the empty “stairs” object, now visible as a component of “stairs” in the inspector.
Inside the script component just added, locate the field box called “Step Prefab.” Right now, it should say “None (Game Object).” This is where we will make the connection between the Unity 3D world, and the MakeStep script. To do this, drag and drop the stepPrefab object in the Assets/prefabs folder over to the Step Prefab box in the inspector window. Now our world and our script should be connected together.
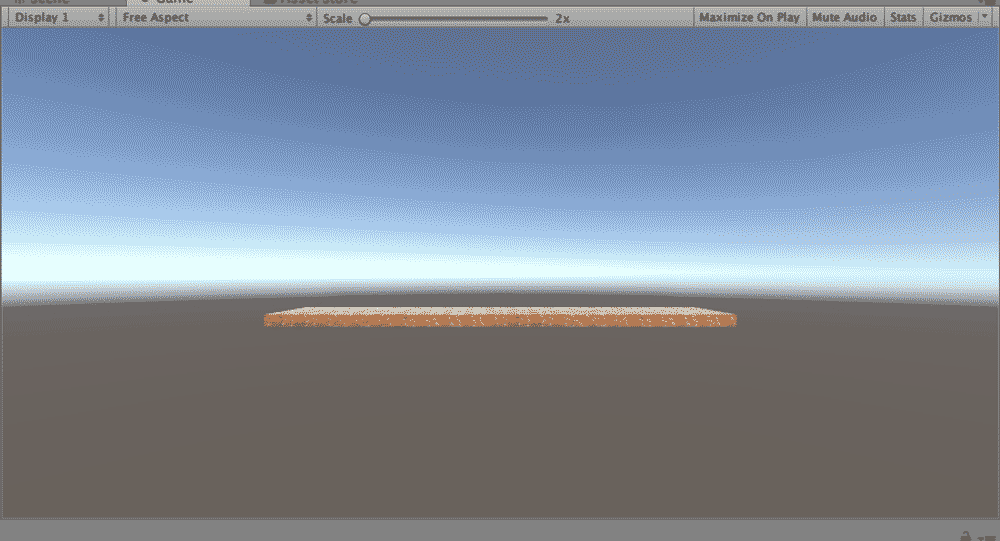
If everything is in order, it is time to test our world. Click the play button in unity. You should now see an instance of the stepPrefab object.
Next up, we will build a set of stairs using this object.