Monthly Archives: October 2017

Escape Room

escape room
My Escape Room Team

Last night my family and I participated in a fun fundraiser at the high school – an “escape room.” I have been hearing about these escape rooms recently. My kids as well as my students have been talking about them, so when our school set one up we had to try it out.

Although there was a short informational video, we walked into the escape room knowing very little about what we had to do. There was a science scenario, in which the world is going to end by a pandemic disease unless we solved the puzzle within the next hour.

Sorry world, you didn’t make it!

Our team included my wife and two kids, as well as my sister and her son. All of the kids were in the 12-15 age range. We weren’t allowed to bring personal items into the room, including cell phones. I guess most escape rooms are actually locked, and you have to free yourselves, but ours just had the door closed. It didn’t matter. It was still a bit unnerving being cooped up for an hour.

We started poking around the items looking for clues. It was an English classroom, turned into a science laboratory. There were chemicals and books and messages, and several locked toolboxes with multiple locks on them.

Our escape room had a telephone with instructions on how to phone in for three clues that would help us. But the clues were pretty mysterious in themselves.

We managed to get one toolbox unlocked, and inside it were some vials of some colored liquids. Also, there were litmus paper strips we could measure the PH of the liquids with. Somehow, after a couple of tries, we managed to use the numeric PH levels as the secret combination on another lock. But that is about as far as we got.

The activity required good communication, teamwork, thinking and problem solving skills. I think it is an excellent thing for people to be doing, especially young people. For an hour we actually got away from our technology a little while and spent some quality “together” time. But for me, it also showed some of my own shortcomings. Getting frustrated, losing patience, working on a team with everyone tripping over one another, not communicating well.

Some things that would have helped us include:

1) bring a notepad and pencil. I didn’t have anyway to write down information that was needed later.

2) Communicate when we found something new. Several times, somebody found something that would have been useful, but couldn’t make sense of it, and left it alone. Nobody else knew about it. If we announced that we found something to the group, we could have taken turns at it.

3) More time. We probably spent 15 minutes just figuring out what we were supposed to be doing.

Doing this activity has me wondering if there is something here that could be brought into a classroom setting. I’ve read a little bit about gamifying courses, but haven’t done much with that idea yet. The closest I’ve come is using skits and simulations. A full blown escape room, built upon technology concepts we have been learning in class seems like it might have some potential. Stay tuned!

Skype With Dan Felder

Dan Felder

Last week, we did one of my favorite things you can do in the classroom in this age of the Internet – we brought in an expert guest speaker via digital teleconference. Right away, I was reminded of my age when I heard murmurs in my classroom as I brought up the Skype interface on the big screen. “I’ve never seen what Skype looks like before,” I heard one student say. Not because it is so new, but at 14 years old, it is old school to my young college students who have a plethora of telecommunications media at their fingertips.

Evidently, however, this old dog still has a few tricks up his sleeve. Our guest was Dan Felder, a game designer at Blizzard Entertainment, and it was a student who made the initial contact and invitation to visit with our class. For years I have been promoting the value of using social media as a serious professional networking tool, and our K-State Polytechnic student Jon Gabay connected with Mr. Felder initially through Twitter, and then with LinkedIn. I’m always happy when the advice I give for using social media to build a personal learning network actually pays off.

When I heard about Mr Felder, I encouraged Jon to reach out and see if he was willing to video chat with us. He did, and we recently did the video chat. Some of the suggestions I learned that day include:

  • Explore how games work. Reinvent existing games. Make new games up.  Dan made a new board game up every two weeks while he was in college, starting with existing games and reworking them.
  • Tabletop Simulator is highly recommended for testing out game ideas.
  • Regarding the design process, he said to design 100-1000 things for every one thing that you actually wind up using. This is solid advice for any kind of designer, not just for game design.
  • He spends most of his time working on his process. He studies architecture. He studies psychology. He uses music playlists to design with feeling.
  • Listen to player community perceptions, but not their advice. Perceptions or feelings about the user experience are always right, but their recommendations for improvement most likely won’t be helpful. That’s where  experience and expertise come in to play.
  • For more on the art and science of game design, he recommends seeing his Design 101 series on Gamasutra.

It was a great honor to have Dan Felder visit our game development class this semester. Thanks Dan!


Quick Unity3D Timesaver

Well, I’ve been working several months in Unity 3D, and I only today discovered this wonderful time-saving tip. Unity has a quirk (at least I call it a quirk) in which you can edit code and project properties while doing a run mode test, but every change you make is lost when leaving run mode. I think the purpose is to see what effect temporary changes have on a project without having to make them permanent first. But it gets annoying if you happen to forget that you are making edits in run mode.

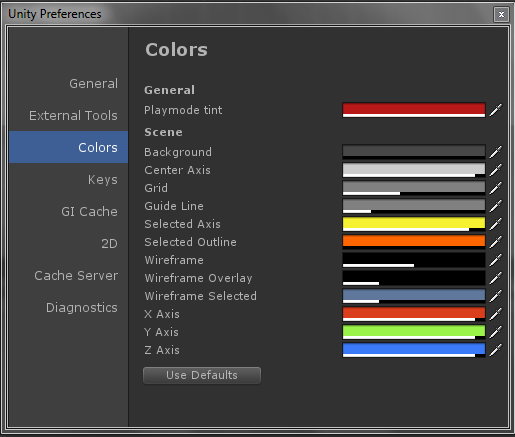
Well, here is the solution that I’ve only now discovered. Simply edit the Unity preferences to make color mode display a different color when it is running.

Playmode Color

I’ve changed the interface to show the color red during playmode. You can find Unity’s preferences either under the pulldown menu Unity -> Preferences on a Mac, or under Edit-> Preferences on a PC.

Wiggle Stereoscopy & Simulated 3D

This is a re-post and update of a blog post I wrote some years ago on my old edublogs blog.

wiggleFountain

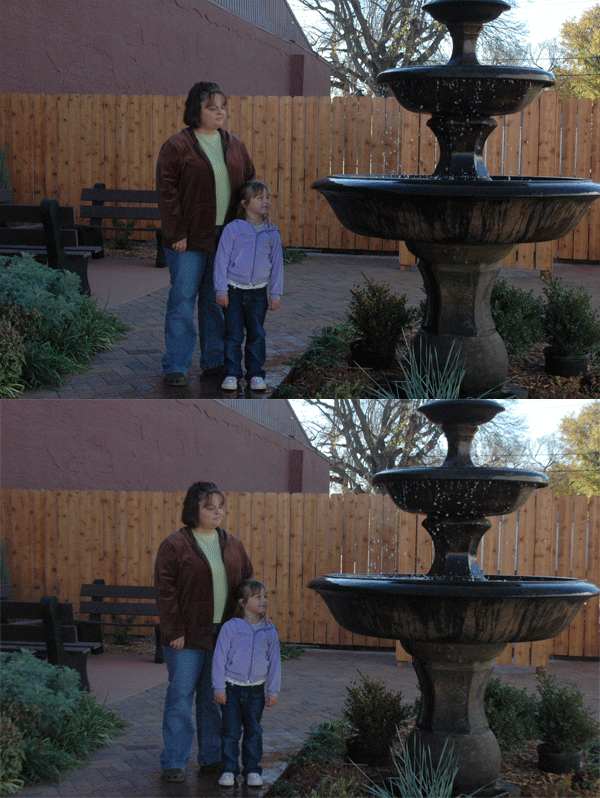
You can create simulated 3-D stereoscope photograph by wiggling two slightly different angles of the same pictures, as shown in this picture of my wife & daughter. I’ve been wanting to experiment with this for some time after reading about Wiggle Stereoscopy. I have created this image by showing two successive images in an animated gif picture made with ImageReady.

The two images I am using were not made with this technique in mind, but when I viewed them together it seemed to work. I think it might work better if I kept the camera on the same horizontal plane, rather than changing both horizontal and vertical viewing angle. But like I said, the two images were accidentally made.

We are able to see in 3-D because our two eyes see the world from slightly different angles. A Viewmaster toy is a good example of a true 3-D stereoscope. This technique is only simulated because you aren’t viewing both images at the same time. It’s still pretty cool, isn’t it? What do you think?

The animated fountain gif image shown above was created in Photoshop using two frames. A simple Google search will provide instructions on how to do animated gifs in Photoshop so I won’t go into detail here.

Since my original experiment with wiggle stereoscopes using animated gifs and Photoshop, I’ve also dabbled in creating 3D imagery using AfterEffects. You can see an example of what this looks like below:

Lightshow Project

Two years ago, I bought a Raspberry Pi “for the family” and we messed with it for a while, but it soon found its way to sitting a box in the closet.

Last year around Christmastime, I explored an idea that’s been floating around in my head on making a Christmas light display set to music. It wasn’t long before I found this post on making Christmas tree lights flash to music.

I became intrigued enough to order the solid state relay board that was recommended, and since they were cheap I purchased two. I think they came directly from China because they took several weeks to arrive. By that time, the new year had arrived, and my interest waned. I put them in the closet with the Pi, thinking maybe next year.

With the cooler weather and heading into fall, I’ve been thinking ahead and wondering if I couldn’t make those things actually work in a lightshow. As you can see from the video at the beginning of this post, things are actually coming together. It took me quite a while to sort out what needed to be done, and to get the information I needed to make things work. I was so excited when I actually got the first light to blink!

In the next post, I will write a step by step set of instructions of what I learned, so hopefully it can help save someone some time getting things set up. I’m nowhere near an expert on this, but am very happy that some things are starting to come together.

***Edit***

With a little more tinkering, I was able to get three channels working with some music . I’m still working on a tutorial post on how it was done. In the mean time, here’s a short video of the lights & music.

3-D Jack-o-Lantern

3D printed jack-o-lantern

Here is a cool project we did last Halloween in my Visual Literacy class.  My student created a pattern in Adobe Illustrator from an image “Soul Eater Moon” which evidently comes from the Soul Eater manga. I’m not “with it” enough to be familiar with Soul Eater, but here is a photo of the scene that was used.

Here is the vector drawing that was created to use as a pattern.

pumpkinCarvingPattern

Here is what the finished pumpkin looked like. The open areas provide the brightest light. The shaved away areas allow some light to be seen for a mid-value. The skin areas are opaque, so those areas remain dark.

Finished Pumpkin

Here is what the finished pumpkin looked like when lit up.
kyler

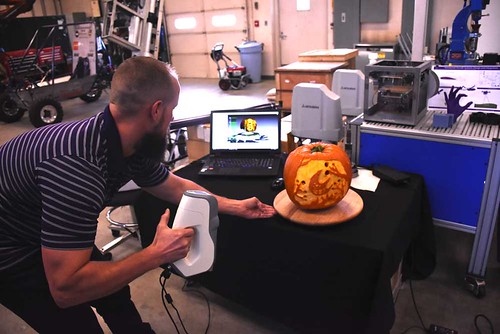
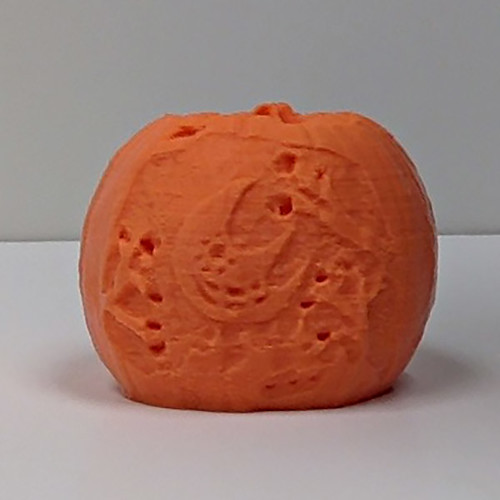
We took things another step forward and scanned the pumpkin using the handheld 3D scanner that the Mechanical Engineering Technology folks at K-State Polytechnic recently acquired. The scanner creates a model that can be used for 3D printing.

3D scanning a pumpkin


Here is the scanned pumpkin
3dPumpkin2
Here is the creator of the pumpkin, Kyler Besher. Nice work, Kyler!
finished5

See more of our pumpkin carving work on our Flickr site.

Unity Object Rotation

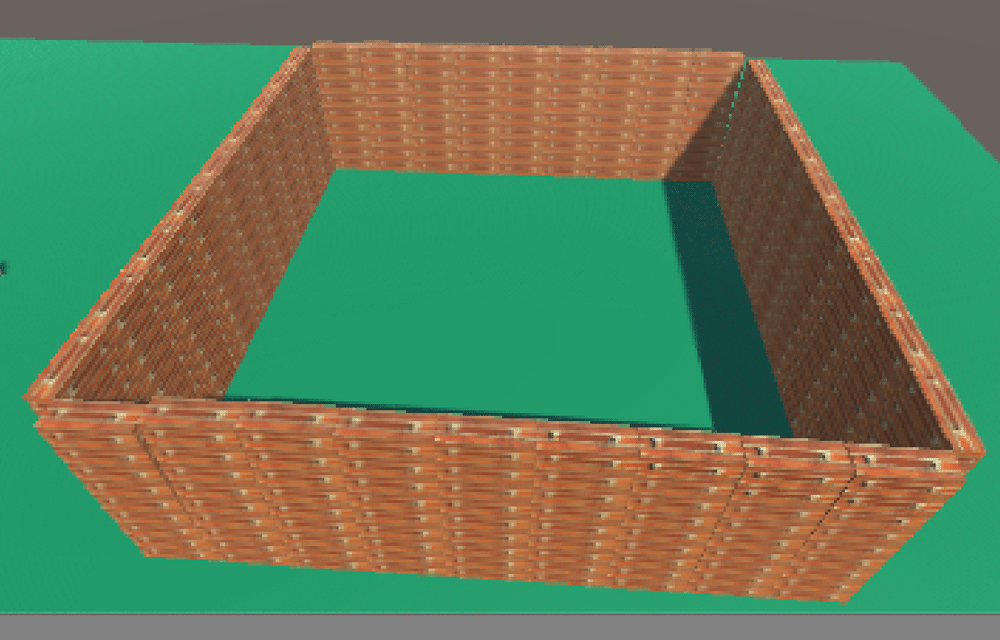
One of the things that has caused me a bit of confusion while working with Unity3D is object rotation. I was working on a small project today in which I was trying to build a four-walled building using C# code. I knew how to build a wall out of cubes using a nested “for” loop. But trying to rotate the objects 90 degrees so I could build four walls, it took me a while to figure out. Back in my days of working with Flash, you simply set the rotation property to the degrees you wanted it to rotate. But that was a 2-D environment. Unity has 3 dimensions, so rotation is more complicated.

To rotate 90 degrees, I found this example from Instantiate a Rotated Object.

Instantiate (object, position, Quaternion.Euler(0, 90, 0));

So it is similar to doing a rotation in Flash, only you have to tell it the axis to rotate on. In the above example, the object is rotated 90 degrees about the y axis, exactly what I was trying to do. I was able to build four walls using this tidbit.

Four Wall Example