Category Archives: Assignments

New Year’s Still Life 2019

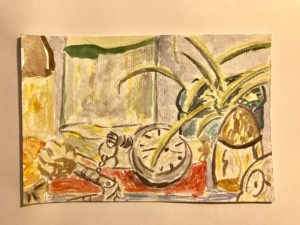
My daughter has been asking me to paint with her. I finally made some time for painting over the New Year’s holiday. We set up a still life of objects we found from around the house. We put an ordinary desk lamp above it for lighting. Here is a photo of the items we found.

My daughter is working with acrylic paints and I have been using watercolors.

First, I suggested we make sketches as a warmup activity. Here is my sketch.

Then I painted a first draft painting. Here is my first draft.

I did two more iterations of the same still life arrangement. Each time I zoomed in the focus of my attention a little more. Here is my second painting


‘See how my strokes are bolder and more confident this time? I left out some of the details.

Finally, here is my third painting. I was interrupted in the middle of making this one. It is a lot more free than the first two.

Today’s Daily Create calls for making a composition using the Rule of Thirds. I typically have this rule in the back of my mind whenever I am making drawings or photographs although it varies on how closely I adhere to it.

Out of the three paintings, I think still life number two most closely follows the rule of thirds.


Creative Attendance Taking

After coming across the Near-Sighted Monkey’s post on using a drawing exercise for taking attendance, I had to share it here. This is absolutely the most creative way I’ve ever seen for taking attendance in a class. Starting with an original drawing, each student was to copy the drawing exactly except substituting the face with a drawing of their own face.

I love the idea of giving a creative assignment like this for taking attendance. I’m going to think about similar creative ways to take attendance in my classes. Well done!

Authentic Writing Assignments


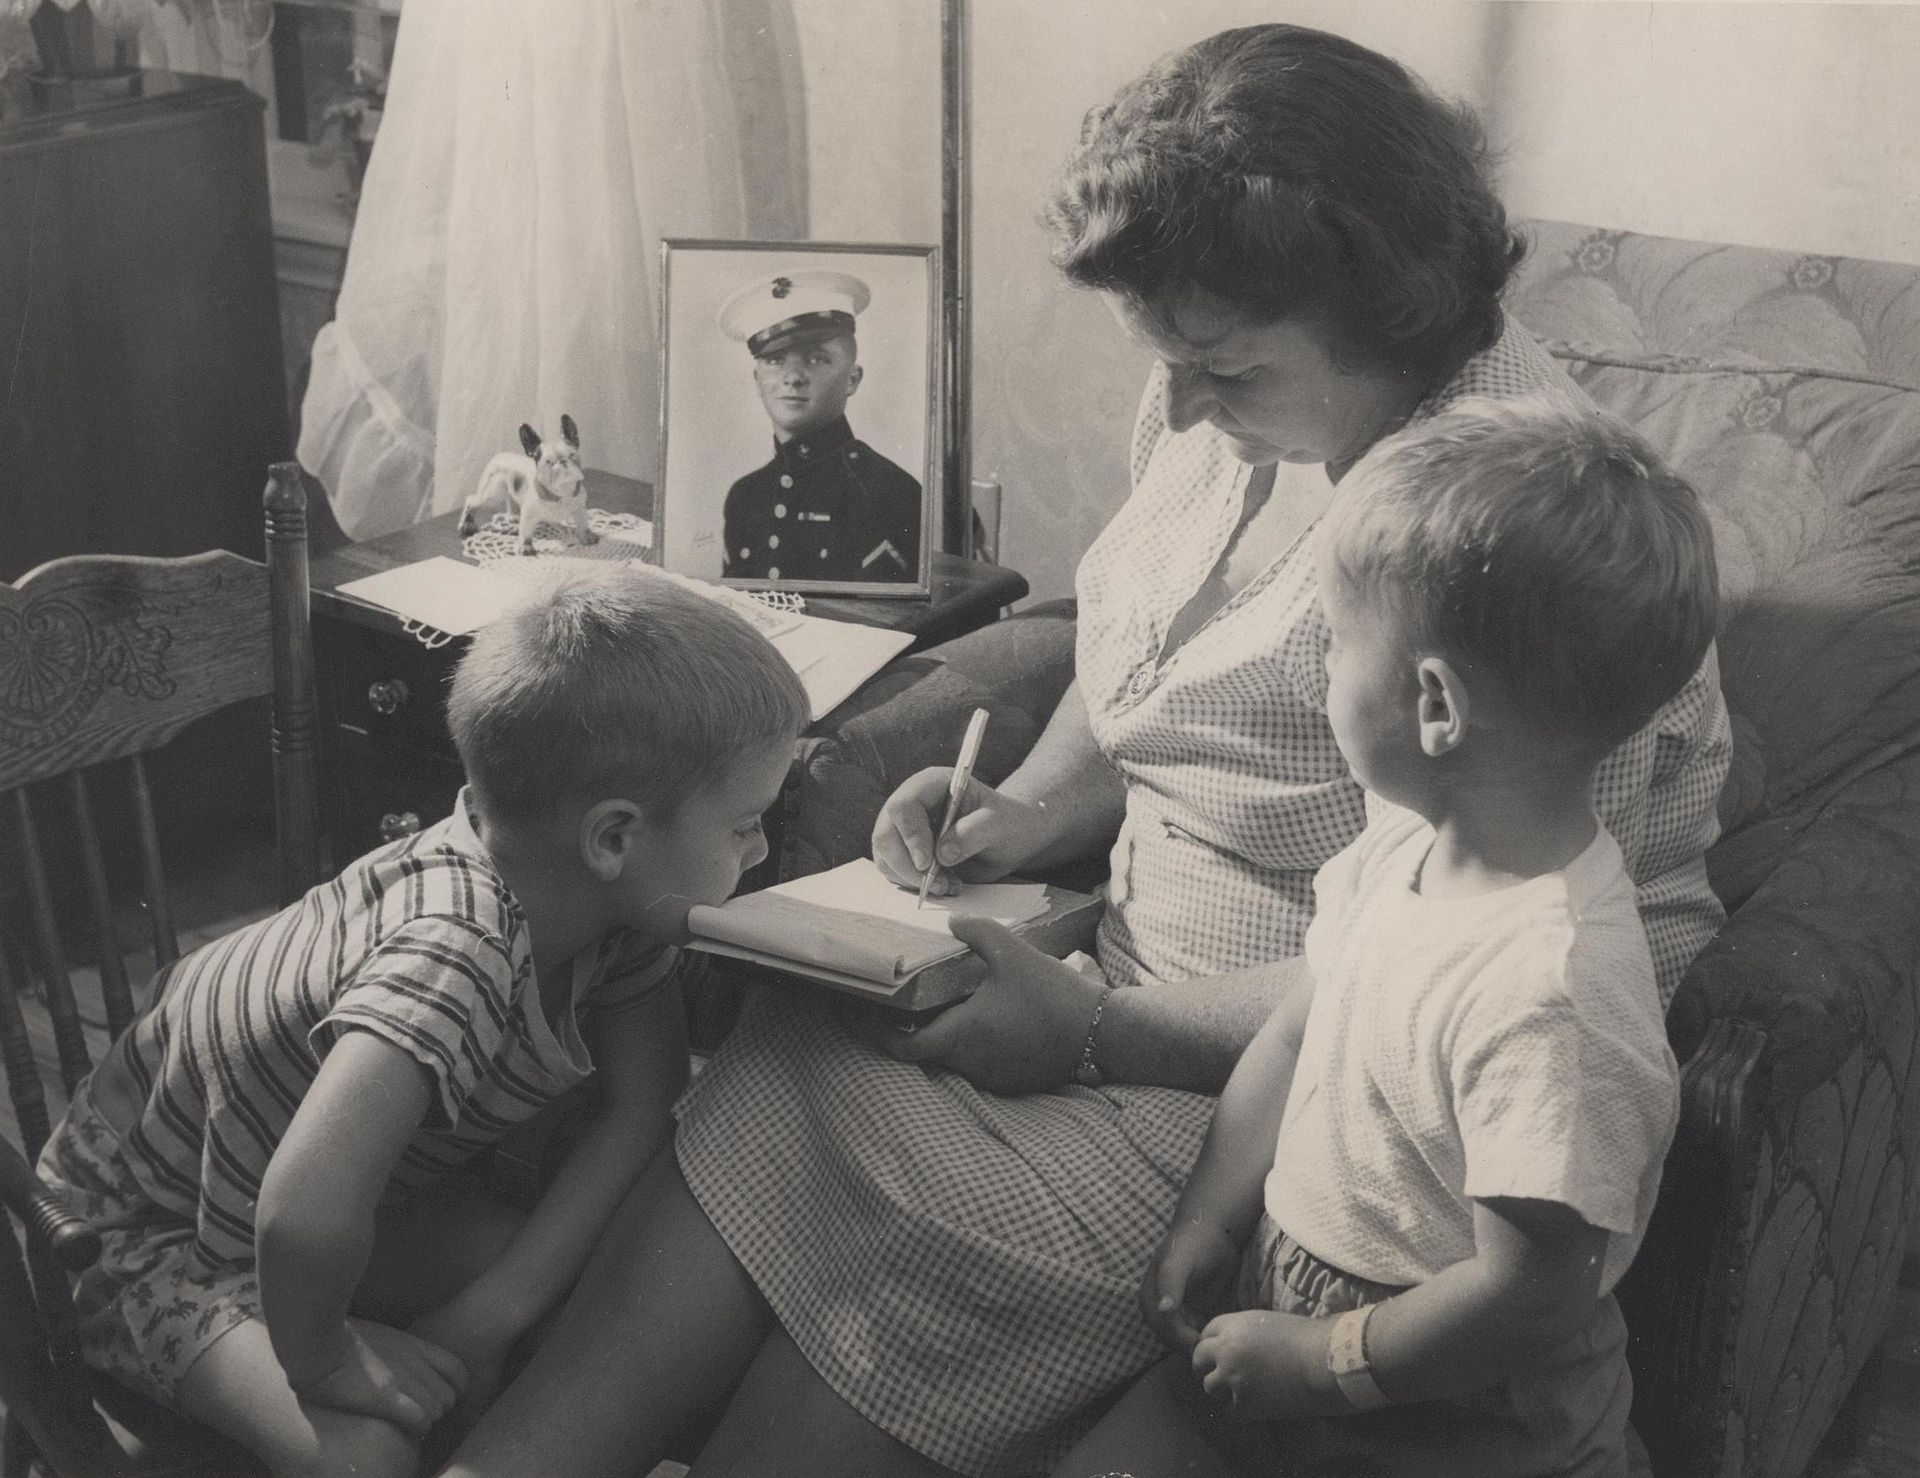
File Photo writing a letter to US Marine
writing letter to US Marine

One of my deepest frustrations that I felt as an undergraduate student were the “contrived” assignments that I was given in the courses in my major of computer science. In my introduction to networking class, we did a lot of readings from the textbook and memorized a lot of facts for the exams we took, all while I was working as an IT director redesigning and installing my first network at the school where I was working. In my database class, we did some case studies of fictitious companies from our textbook, and actually created some databases in MS Access. That was happening while I was working for a municipal utilities department responsible for creating databases that tracked and reported data on water usage in the city.

Now I’m on the other side of the equation, a college teacher. I realize that sometimes we have but little choice but to “make up” scenarios for students to explore and experience. However, when it’s possible, I am a big believer in setting up authentic learning experiences. The more realistic a learning experience is, the messier things can get. I think this may be one limiting factor that makes educators favor the contrived over the authentic. We can make things cleaner and go smoother if we pre-plan every detail in advance. But life never works that way. Usually in life when we embark on a new project, we have no idea of how things will ultimately turn out.

One of the greatest things that our digitally-connected world has to offer students is a learning environment in which the classroom can extend out into the world. This can happen in numerous ways. For example, Mystery Skype is an activity where classrooms in different parts of the world can connect and play a guessing game trying to learn where the other class is located. Experts can interact with students through live video conference, or other online platforms like Twitter.

In many writing assignments, the work is assigned by the teacher, then the student completes the writing work knowing full well that the only reader of the work will be the teacher/grader. If you’ve ever read this type of writing, it often consists of the student writer imagining what the teacher expects, and typically the writing is just as artificial as the assignment.

Early in my teaching career, I was frustrated by my students’ writing.  I wanted to have writing and communication assignments that were more authentic and real than the teacher-as-audience type of assignment.  I read a piece by Connecticut middle school teacher Paul Bogush, describing how his students were motivated by writing for a global audience, rather than the traditional teacher audience, and it spoke to me.

Why not have students write for a wider audience? Why not assign projects and assignments that have potential for having an impact on the outside world? In a world where information is freely available but the quality varies wildly, why not have students share what they are learning with the world? What great practice it is for students to share what they learn and believe, so long as they are asking deep questions, and doing what they can to find evidence-based answers to these questions.

One suggestion I’ve read, and I forget where I found it, is to simply write a letter to a loved one about what is being learned. Explain something complex in terms that a non-expert can understand. I think that is a good place to start. I’m still exploring this idea. How can I create assignments and projects that students will get excited about working on? How can I get them to want to make a difference with the work they are doing in school? I think the more real, the more authentic, the more relevant these assignments and projects are, the better.


Exponential Growth Simulation

I’ve been working at improving my Unity3D skills. We are using Unity in the Game Programming class I’m teaching this semester. I wanted to build a project that focused on creating some GameObjects that interact with each other through various public methods. So I made a growth simulation that represents a group of bacteria eating and reproducing.

The game objects include bacteria, food, and a game manager. All the food object does is keep track of how much food is available, and provide a public method called supplyFood(), with which the bacteria can acquire food to eat. The game manager object creates a grid of food tiles to be used as a food supply. It also keeps track of the number of bacteria in the game through public methods addBacteria() and removeBacteria().

The bacteria does a number of things. I tried to make this object class self-managing. So it has a timer that makes regular calls to the eat() method, and reproduce() method is based on doing a number of eats. There is also a die() method that takes the bacteria out of the game. But it doesn’t completely work correctly yet, I’m still debugging it.

One tricky part was finding out if the bacteria was touching a food tile, so it could eat. I used a collision detection method to initiate that. It is interesting how objects can connect with one another. Here is an example of how the bacteria connects to the food.

These variables are declared to give access to the foodTile object and the supplyFood() method of its food script:

  public GameObject foodTile; // the food object 
  public food food; // the food script found in the foodTile object; provides access to the supplyFood() method. 
  private int foodAmt; // the food counter

When a bacterium collides with (sits upon) a foodTile tagged “food” it opens a connection to the script it contains called “food.” I was concerned that doing this each time a new bacterium is created and collides with a foodTile, it would be a lot of processing overhead. But so far, it seems to be working.

   void OnCollisionEnter(Collision collision)
   {
      if (collision.collider.gameObject.tag == "food")
      {
         foodTile = collision.collider.gameObject; // connects the foodTile to this bacterium
         food = foodTile.GetComponent<food>(); // the food script of foodTile gives us supplyFood() method
      }
    }

Here is the eat() method that uses that uses the food script of the foodTile.

     public void eat()
     {
         int foodAmt = food.supplyFood();
     }

It took me a while to understand how getComponent works. It basically allows access to any component of a given object, including scripts. object.getComponent<component>();

Here is a video of what it looks like in Unity3D right now:

Character Following Camera in Unity3D

One thing beginning game developers using Unity 3D might want to do early on is to have a 3rd person character that is followed around by a camera. It is fairly simple to accomplish, but it can be tricky if not done correctly.

Here are the steps.

  1. Import Assets -> Import Package -> Characters. (Accept the defaults).
  2. Import Assets ->Import Package -> Cameras. (Accept the defaults).
  3. Make a ground object.
    • create a cube object (Game Object -> 3D Object -> Cube)
    • rename it ground
    • set its scale property to (100, 1, 100)
    • add a texture image (just import one and drag it to the ground object)
  4. Add a Multipurpose Camera Rig
    • In the Project tab, find the following: Assets -> Standard Assets -> Cameras -> Prefabs -> MultiPurposeCameraRig
    • Drag and drop the MultiPurposeCameraRig prefab to the scene window
    • Disable the MainCamera by selecting it in the Hierarchy window, then deselecting the checkbox next to the “Main Camera” name in the Inspector window.
  5. Add a 3rd Person Character
    • Also in the Project tab, find: Assets ->Standard Assets -> Characters -> ThirdPersonCharacter -> Prefabs -> ThirdPersonController
    • Drag and drop a ThirdPersonController prefab to the scene window
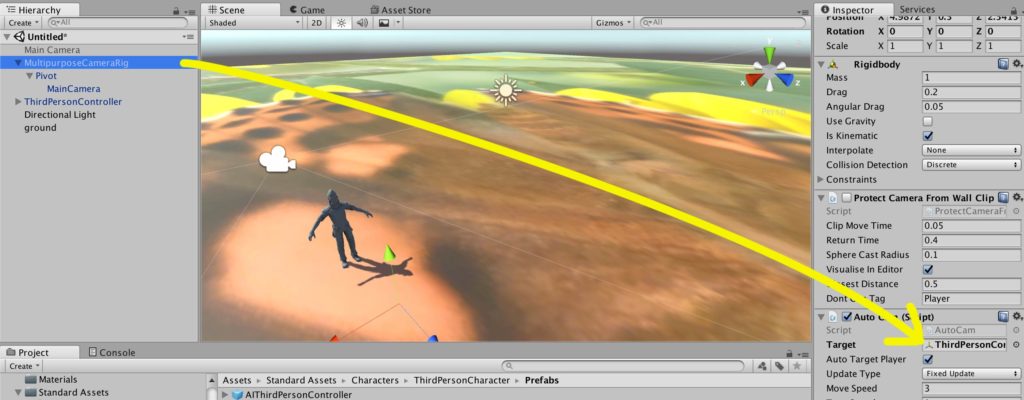
  6. Connect the Multipurpose Camera Rig to the ThirdPersonController
    • Select the MultipurposeCameraRig object in the Hierarchy window.
    • Drag the ThirdPersonController from the Hierarchy window to the “Target” field of the MultipurposeCameraRig’s Auto Cam Script found in the Inspector panel. (Should be dragging across from the leftmost panel to the rightmost panel.) Connect Camera to Character
  7. That’s it. Play the game and if everything is setup correctly, you should have a camera that follows the player.

Instantiate a Prefab using Code in Unity 3D – Part 2

In our previous post, we learned how to use code to create an instance of a prefab object in Unity3D. In this post, we will see the power of using code to do repetitious work. Whenever I think of using code to do something that repeats, I think of using loops.

Last time we created a graphic that represented one single step of a staircase. Now we will create many instances of that same graphic, and move them in such a way that it builds a staircase. To do that, we will use the famous “for/next loop”

instPlank4Here is our single step. Now let’s make some more to create a staircase.

Open the “MakeStep” script from last time. Look in the Start() method for this line of code:

Instantiate(stepPrefab, stepPos, Quaternion.identity);

This is the piece that brings our stepPrefab into our Unity world. Now, let’s add a for loop around it to get it to repeat and build a “Stairway to Heaven.” Your code should look something like this:

for(float i = 0; i < 20; i++) 
  { stepPos.y = i;
    stepPos.z = i;
    Instantiate(stepPrefab, stepPos, Quaternion.identity);
  }

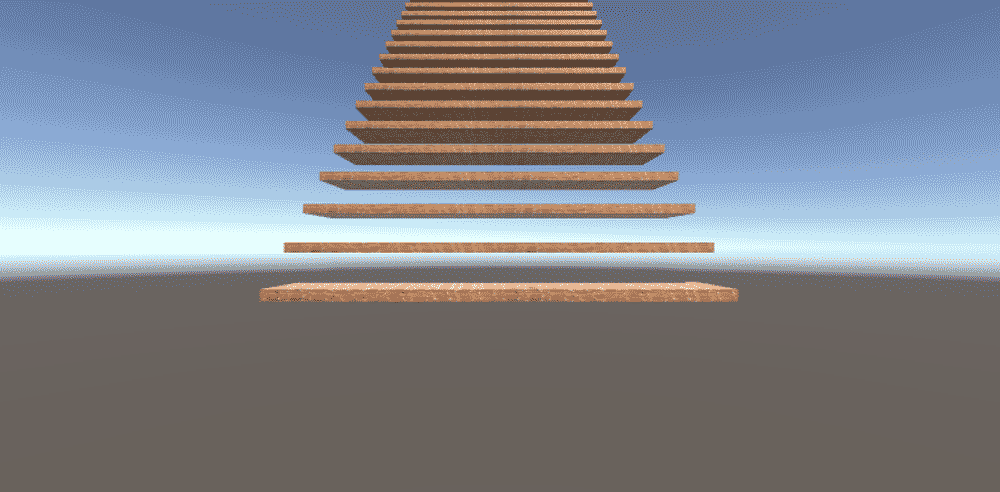
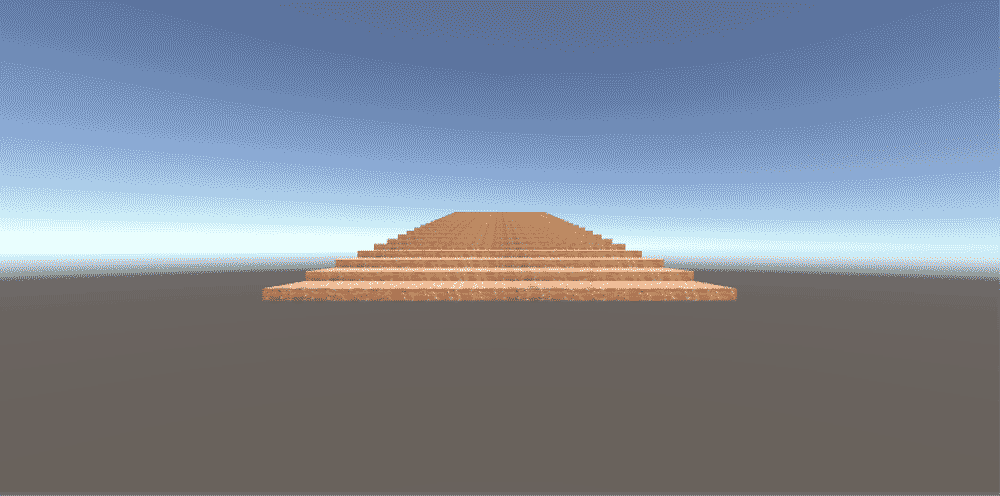
If we run the code at this point, we’ll get a staircase that looks like this:

instPlank5

The y values are too far apart, and the z values will overlap. I want my staircase to be useable by a character in the game. So I will modify my loop to bring my steps closer together.

for(float i = 0; i < 20; i++) 
  { stepPos.y = i / 4;
    stepPos.z = i * 2;
    Instantiate(stepPrefab, stepPos, Quaternion.identity);
  }

This is more like it:
instPlank6Now, we just have to add a floor, and a character to the scene, and we’ll be in business!

To make a floor, create a new cube. Set its position to (0,0,0). Give it a texture using a graphic or color using a material. Set its scale to 100 x 1 x 100.

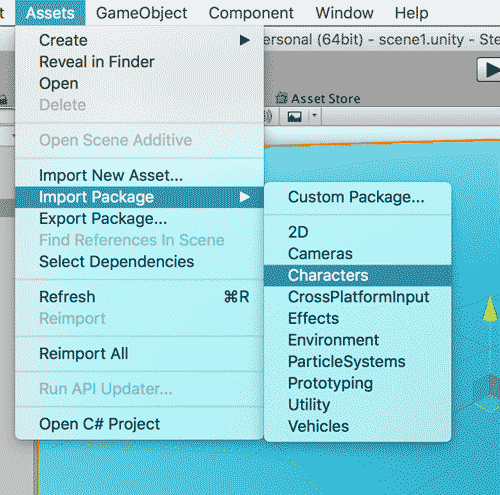
To add a character to the scene, Import the characters package, accepting all defaults. It will take a minute or two to bring in all of the stuff for characters. It is found under Assets -> Import Package -> Characters.

instPlank7

After everything installs, in the newly created “Standard Assets” folder, go to Standard Assets -> Characters -> FirstPersonCharacter -> Prefabs and select  the FPSController prefab. Drag it into the scene. Because the character has its own camera, you should disable the Main Camera in the hierarchy.

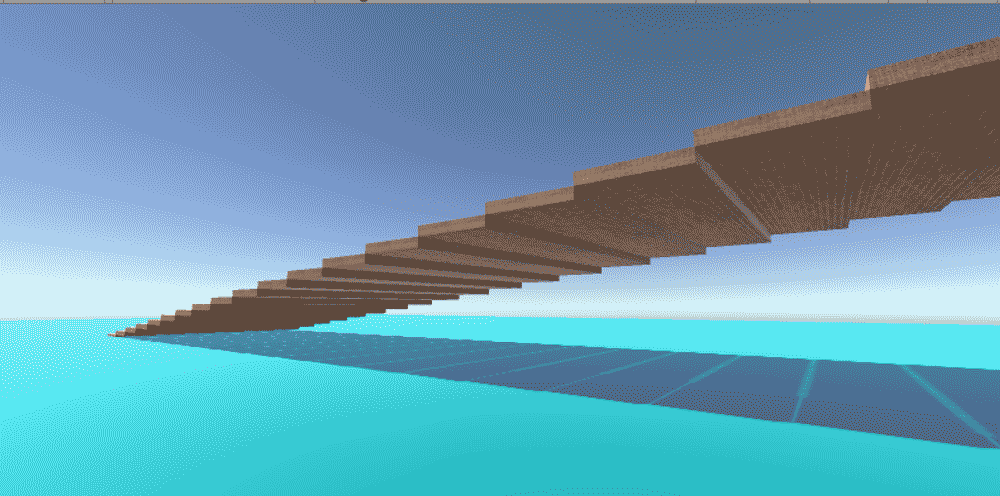
You should be able to play the game and move around in the world you just created using the mouse and arrow keys. Here is a view from beside the staircase.

instPlank8So that is my introduction to creating prefab objects in Unity3D using C# code.

Students and Educators can get Unity3D for free so you should try it. Download it here.


Instantiate a Prefab using Code in Unity 3D – Part 1

This year, in the Game Programming course I teach, at the urging of my students we have begun working with Unity3D. I’ve always used Flash in the past for this course, but some things have changed for me both personally and professionally to where I felt I could spare the time to begin with a new development platform. Any interested students or educators can learn along with us by downloading Unity3D for free.

For this post, we are going to discuss creating prefab objects (just a saved game object that has some preconfigured properties added to it) and using code to create instances of those prefabs.

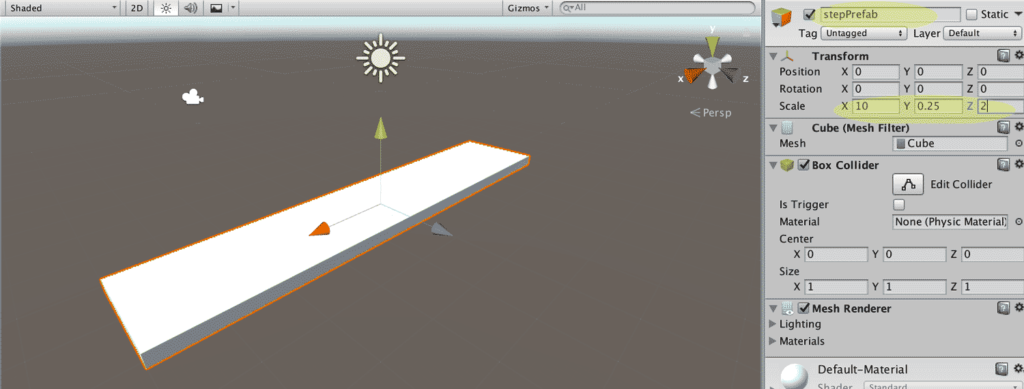
To begin, let’s make a prefab object by creating a new cube (Game Object -> 3D Object -> Cube) and setting its position at (0,0,0). Rename this cube to “stepPrefab.” Scale the x dimension to 10, and the z dimension to 2, and the y dimension 0.25. This will create a plank-like block that will become a step in what will later become a staircase.
instPlank

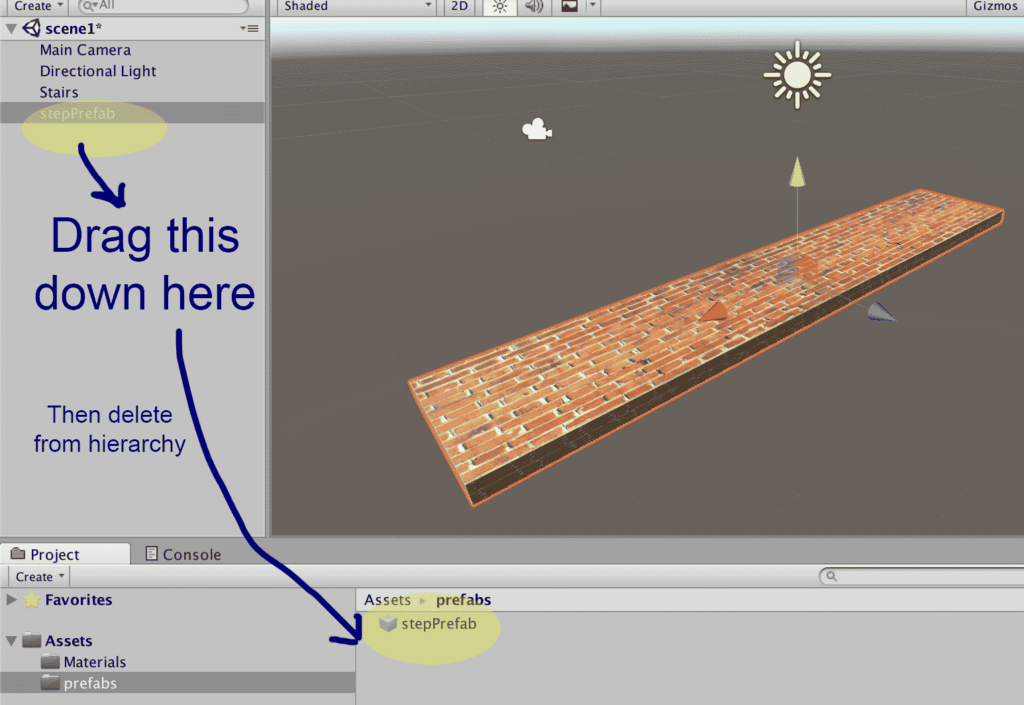
Decorate the step as you like using materials or graphics. Online, I found an image of bricks I used to make a brick texture, but you can also simply create a material and set its color to use. Once you have decorated the step, create a “prefabs” folder in the project panel under Assets. Drag and drop your decorated brick into the prefabs folder. There it will become a prefabricated object or “prefab” that we can manipulate with code. Delete the stepPrefab object from the hierarchy tab, but leave it where you put it in the prefabs folder. Except for the light and camera, our world should be empty again.
instPlank2

Next, create a new folder called “scripts” under Assets, also in the Project panel. Create a new C# script inside of the scripts folder, either by right-clicking or clicking on the Create button. Name this script to “MakeStep.” Double-Click the “MakeStep” script to open it in an editor.

Just inside of the MakeStep class, declare a public variable of type Game Object called “stepPrefab” and a second of type Vector3 called “stepPos” at the game’s origin position. That code looks like this:

public GameObject stepPrefab;

public Vector3 stepPos = new Vector3(0f, 0f, 0f);

Now, inside of the Start() function write a line of code that will instantiate (create)  an instance of our stepPrefab object. Here’s the code:

Instantiate(stepPrefab, stepPos, Quaternion.identity);

Here, the Instantiate function creates a new stepPrefab object, places it at the stepPos position, and uses no rotation (that’s the Quaternion.identity bit.)

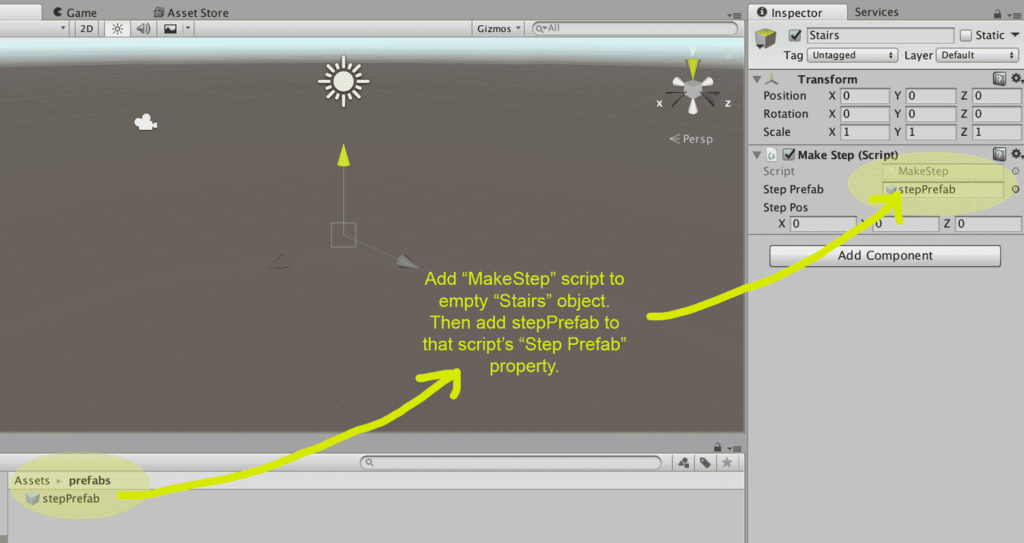
Save and build the script. Now, switch back to Unity3D. Create an empty game object. Give it a name “stairs.” With “stairs” still selected, browse to the folder containing the MakeStep script, and drag that script on to the “add component” area of the inspector window. This should add the MakeStep script to the empty “stairs” object, now visible as a component of “stairs” in the inspector.

Inside the script component just added, locate the field box called “Step Prefab.” Right now, it should say “None (Game Object).” This is where we will make the connection between the Unity 3D world, and the MakeStep script. To do this, drag and drop the stepPrefab object in the Assets/prefabs folder over to the Step Prefab box in the inspector window. Now our world and our script should be connected together.
instPlank3

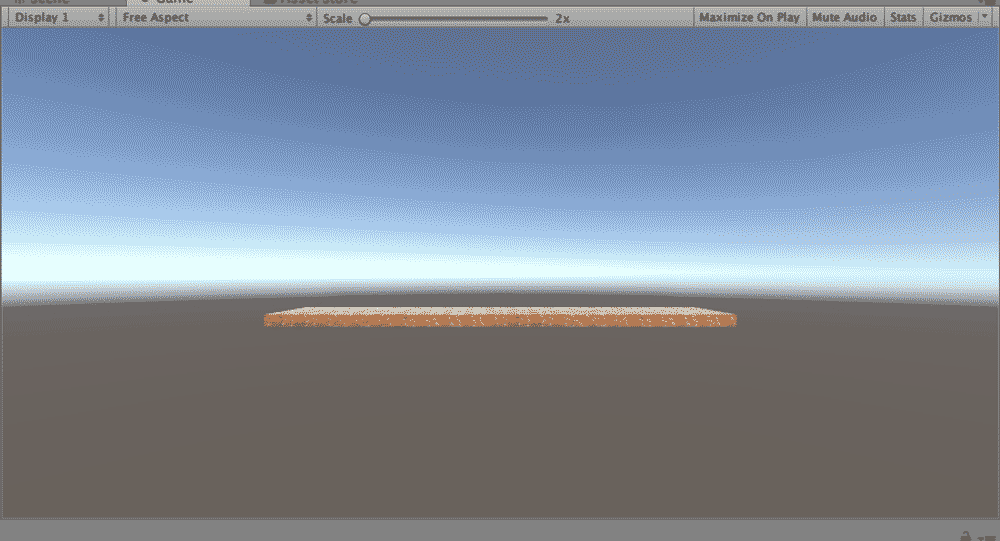
If everything is in order, it is time to test our world. Click the play button in unity. You should now see an instance of the stepPrefab object.
instPlank4

Next up, we will build a set of stairs using this object.

Unity Programming – A New Platform.

I’ve been teaching the Game Programming class with Unity 3D for two weeks now. This is the first time we’ve used Unity in the class. It’s been interesting, and a challenge to my previous knowledge on the subject. In previous iterations of the course, we used Flash and Actionscript.

Something new I learned about recently is the comparison between inheritance and composition in object oriented programming. I hadn’t really encountered composition before, only the inheritance approach. So when diving into Unity, I didn’t really see OOP with inheritance and I wondered why that was the case. It turns out the Unity uses a composition approach.

Basically, instead of having a superclass and subclasses that all must conform to or override the superclass, each object is assembled out of components or capabilities.

This old JavaWorld article explained it nicely for me. https://www.javaworld.com/article/2076814/core-java/inheritance-versus-composition–which-one-should-you-choose-.html

Denny’s Blog

I am always learning new things from my students. This week, I learned about the Denny’s Restaurant blog. It is full of wonderful, punny food GIFs like this one:

Hamboni Pun
Denny’s Hamboni

This is a great example of self-deprecating humor that shows it is ok not to take one’s self too seriously. Certainly this approach cannot work for all businesses, but it seems to be working for Denny’s.

I like the Denny’s work so much, I challenged my students to make a series of food GIFs and release them in their own social media campaign on Twitter. We’ll see what happens.

Fire Writing

Lia Fire Writing
Lia Fire Writing by naturalturn 2008 https://www.flickr.com/photos/naturalturn/
I don’t think I’ve ever heard the expression “fire writing” before, as mentioned in this Edutopia article, New Teachers: Inspire Your Students to Write, Write, Write. However, it is exactly how I got things going with my PhD dissertation. I just wrote. And I didn’t worry about how it looked or sounded. It was messy and chaotic, but I cleaned it up later. First I dumped my ideas out of my brain and onto the page as quickly as I could. Then I went back and ruthlessly edited. I cut out huge chunks that I loved and was left with the essence of what I was trying to say.
 
Another great idea from the Edutopia article is something I first read about years ago in Zinsser’s classic book, Writing To Learn. Students tend to write for an audience of one – the teacher. They need to stop it, and we as teachers should stop encouraging it. Zinsser suggested writing letters to a friend or family member about the day’s learning.  I think it is a great approach. Instead of getting hung up on perfect mechanics, get to the main ideas, reflect and write about them. Quit worrying about what you think the teacher might want, and write the important ideas in a voice that someone who loves you and cares about you would recognize as you. If it comes out wrong, you can always improve and revise.
I teach a class that includes a lab activity and requires lab reports. I wonder what those might look like if they were composed in the form of a letter? Right now, I have a prescribed format that I’ve been using since I first started teaching the course. I inherited the report structure from the person who taught the class before, and haven’t ever questioned it. Perhaps it is time for me to take a closer look at that important writing assignment.